Pool assembly
The Pool comprises a bolted steel frame, a PVC tarp inside it, the Playing Field on the floor, and the game elements on top.
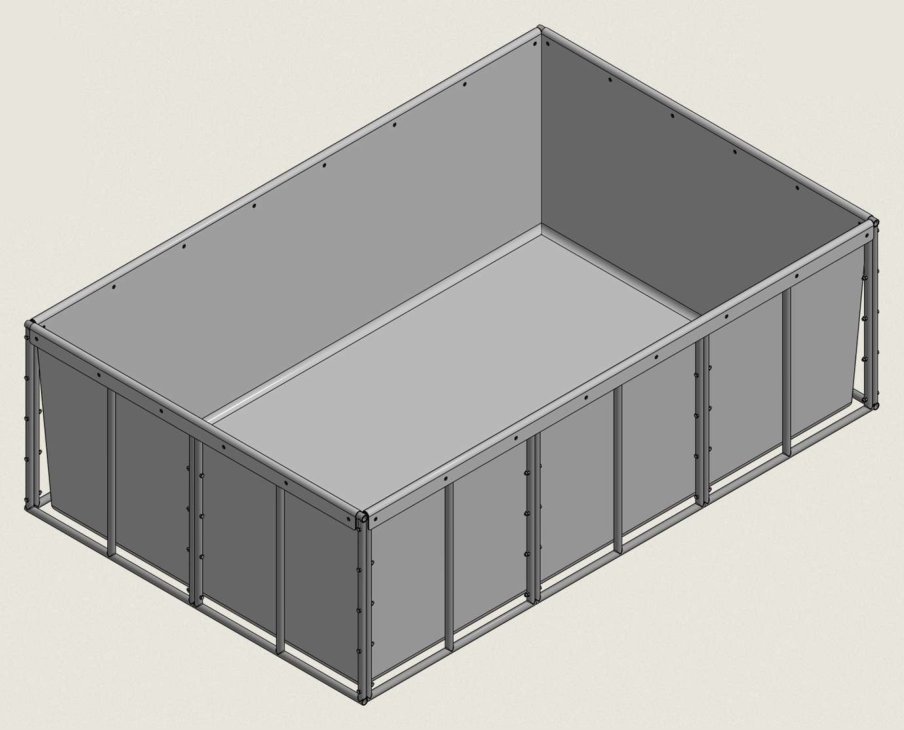
Bill of materials
| Item | Quantity |
|---|---|
| 1000×1000×30 mm steel frame | 10 pc (6 pc Type A, 4 pc Type B) |
| Grey PVC tarp (package approx. 400×200×120 mm) | 1 set |
| M10 hex head bolt and M10 nut | 50 pc |
| Nylon rope | 1 pc |
| PVC ball valve for drainage, with Teflon tape | 1 pc |
| Playing Field, rolled (approx. 3000×2000 mm) | 1 pc |
| Anchorage (acrylic, PVC pipes, fasteners) | 1 set |
| Bollards (acrylic, 3D prints, fasteners, paracord) | 1 set |
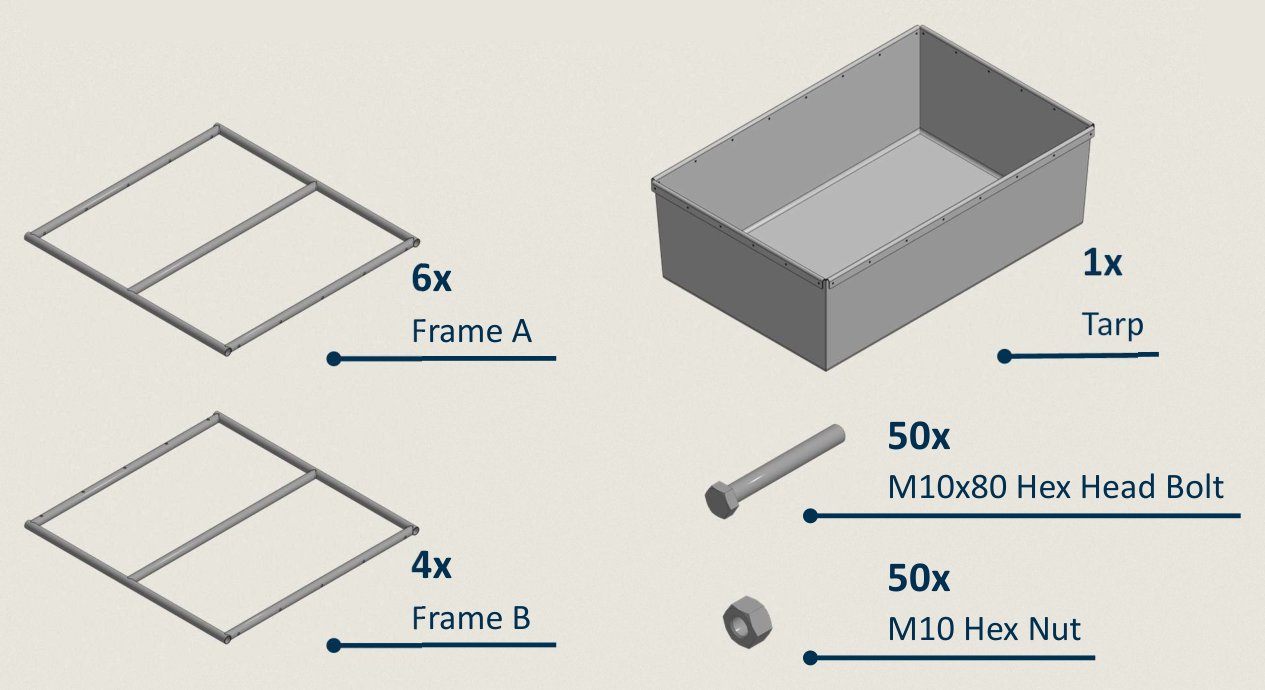
All 50 bolts are used. There are no spares.
You also need two 17 mm (or adjustable) spanners, one to hold the nut and one to turn the bolt.
Manpower
Recommended: 4 people.
Part 1: Assemble the side walls
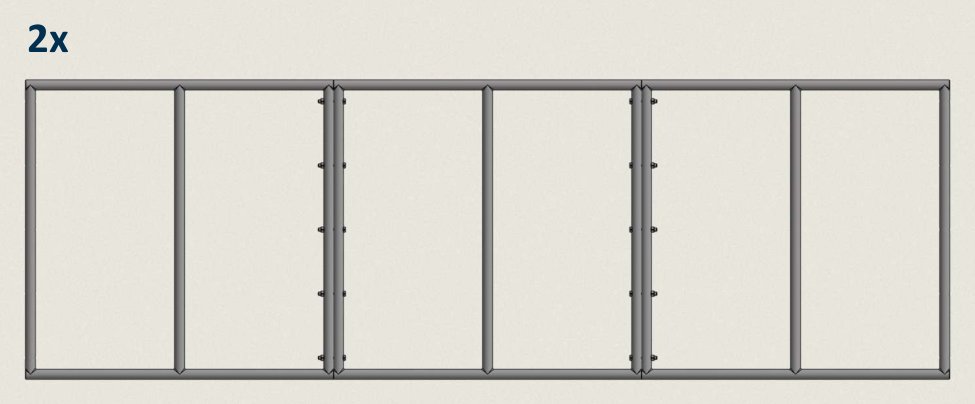
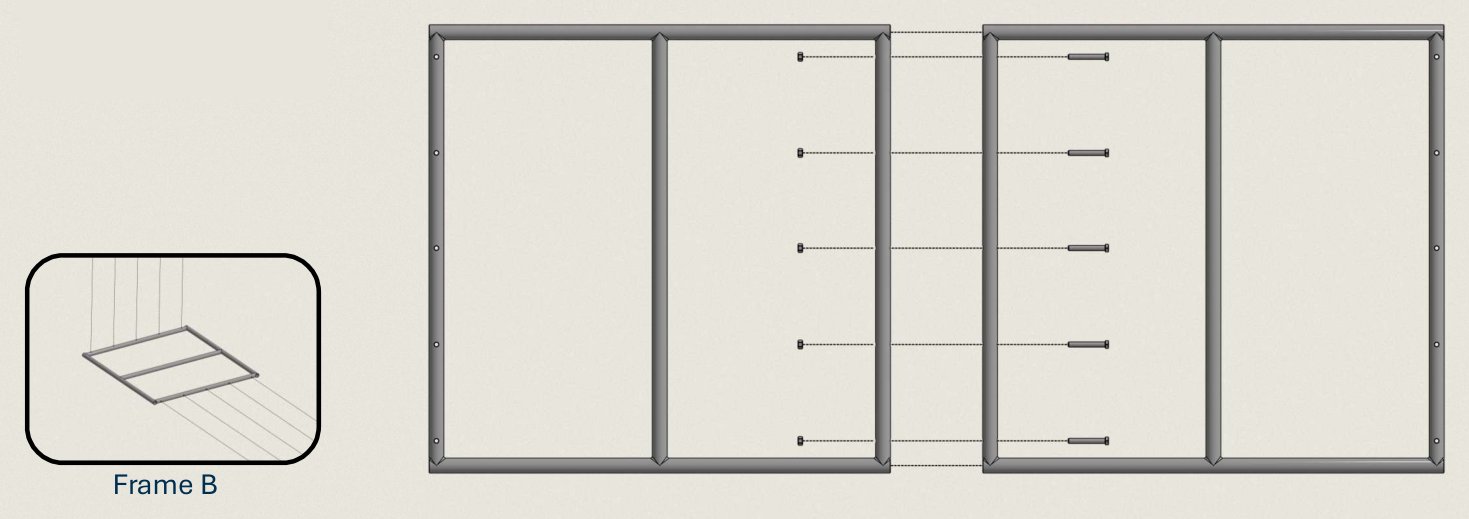
Type A and Type B frames look the same. Their bolt holes face different ways: Type A holes run along the Pool, Type B holes run across it. Sort them into two piles before you start.
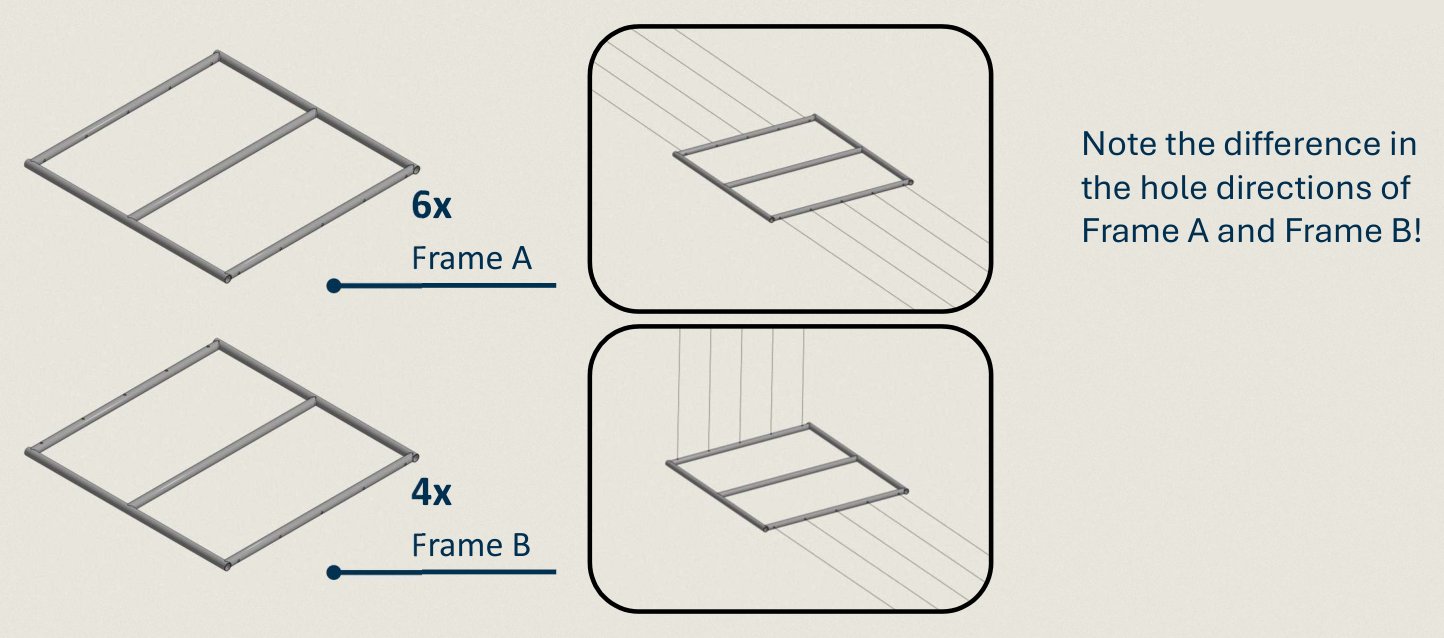
-
Connect 3× Type A with 5× bolt and nut at each joint, 10 total, to make a long side. Two people hold, two people bolt.
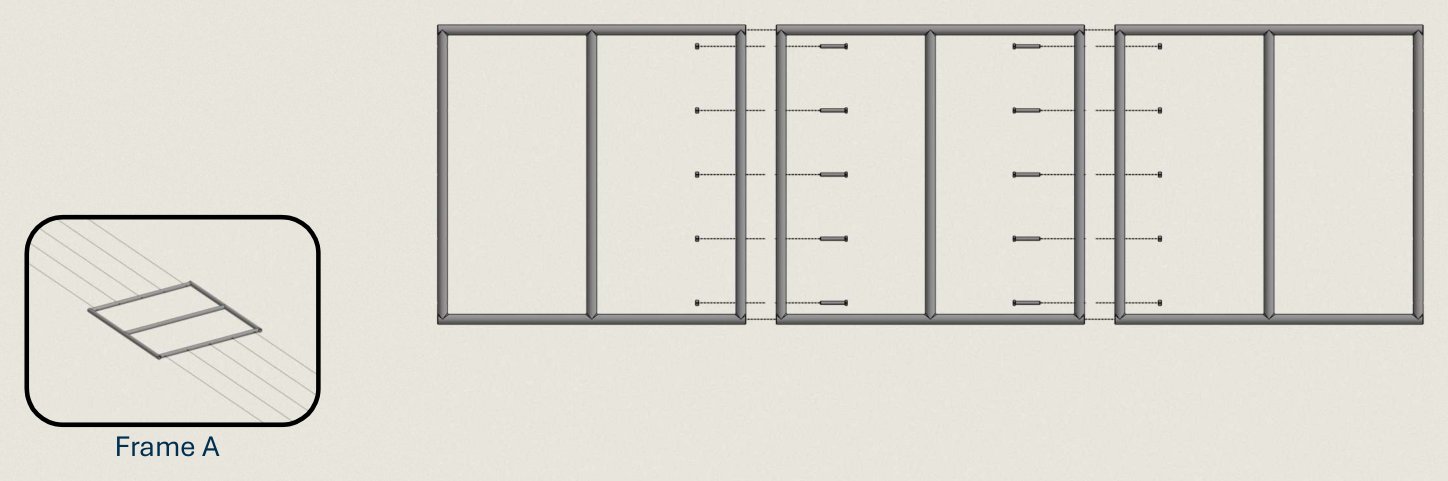
-
Repeat step 1 to make the second long side.
-
Connect 2× Type B with 5× bolt and nut to make a short side.
-
Repeat step 3 to make the second short side.
-
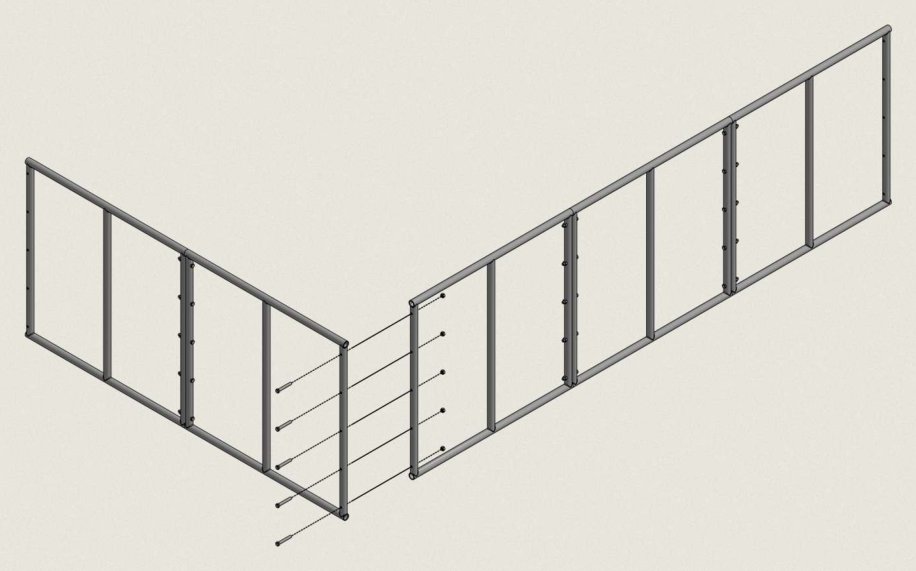
Connect 1 short side to 1 long side with 5× bolt and nut to form an L. Repeat to form a second L.
-
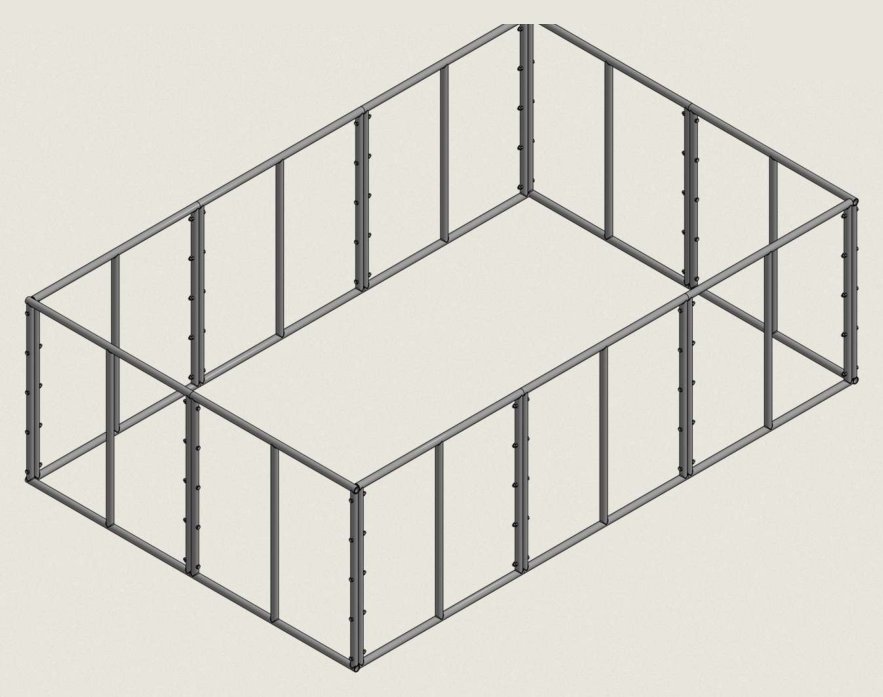
Connect the two L frames with 5× bolt and nut at each of the two remaining corners to form the rectangular Pool frame.
-
Check every bolt is tight. Hold the nut with one spanner and turn the bolt with the other.
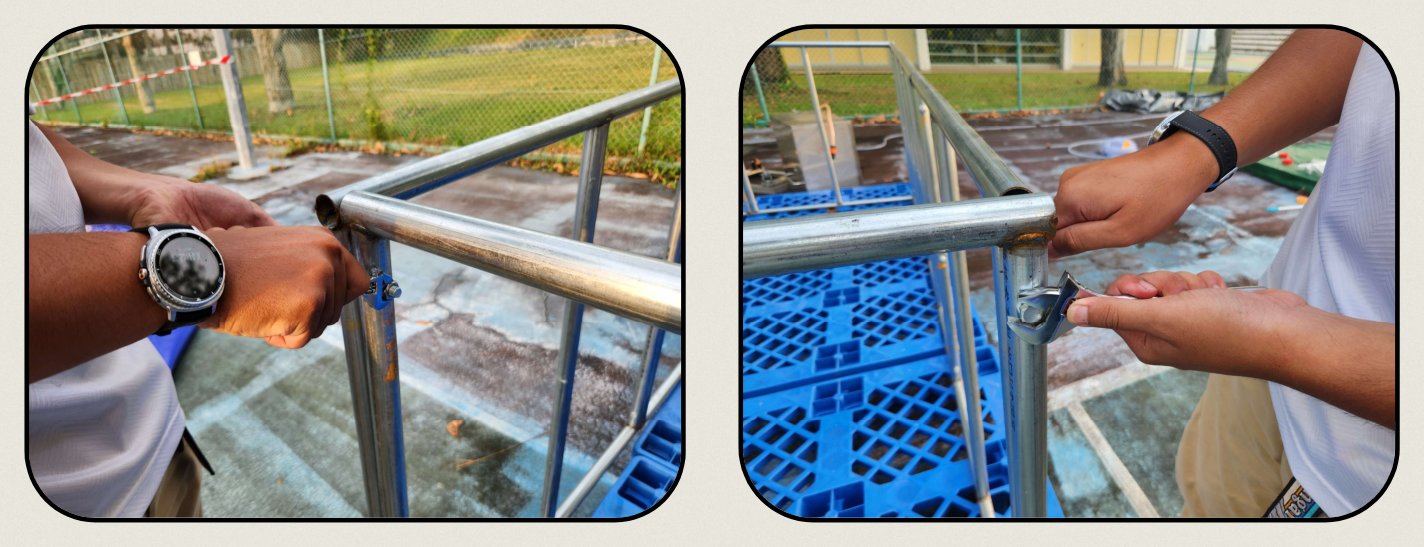
Water pushes outwards on every panel. Do not fill the Pool until all 50 bolts are tight.
Part 2: Install the tarp
-
Unfold the tarp.
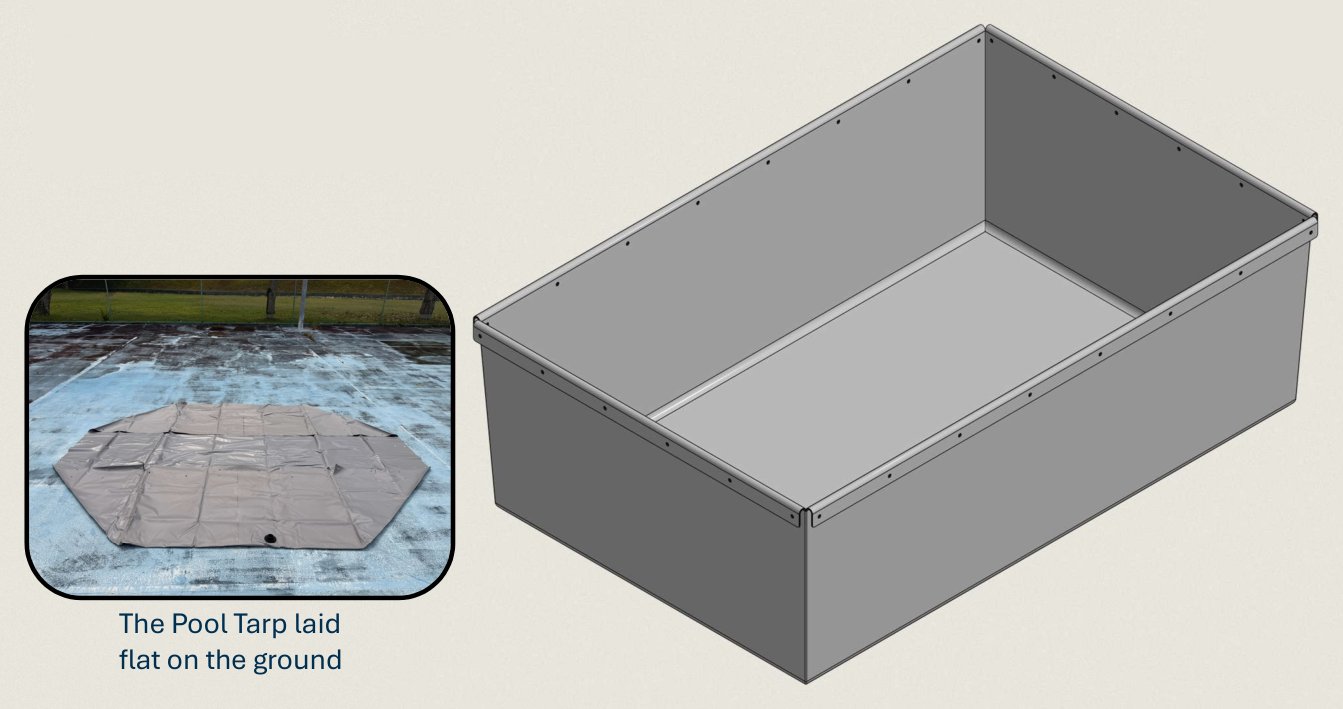
-
Check the drainage port faces the intended direction and sits on the outside of the tarp.
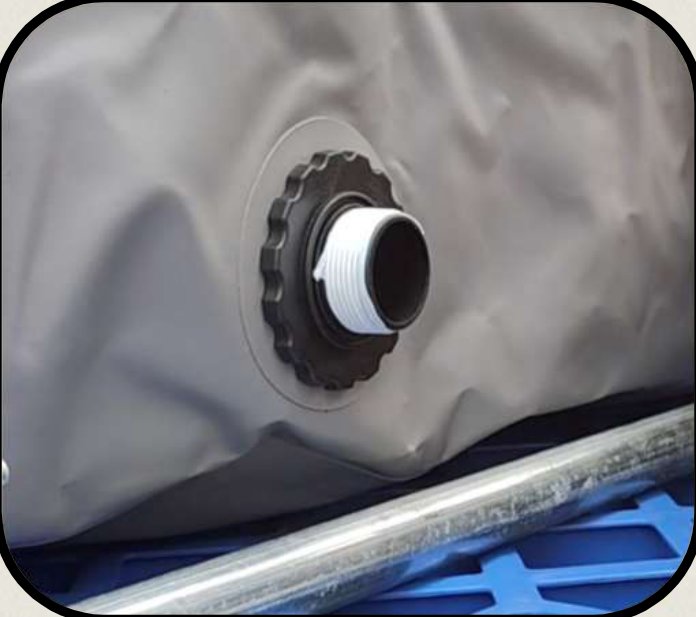
-
Lift the tarp over the frame and lower it in. Align the long side of the tarp with the long side of the Pool.
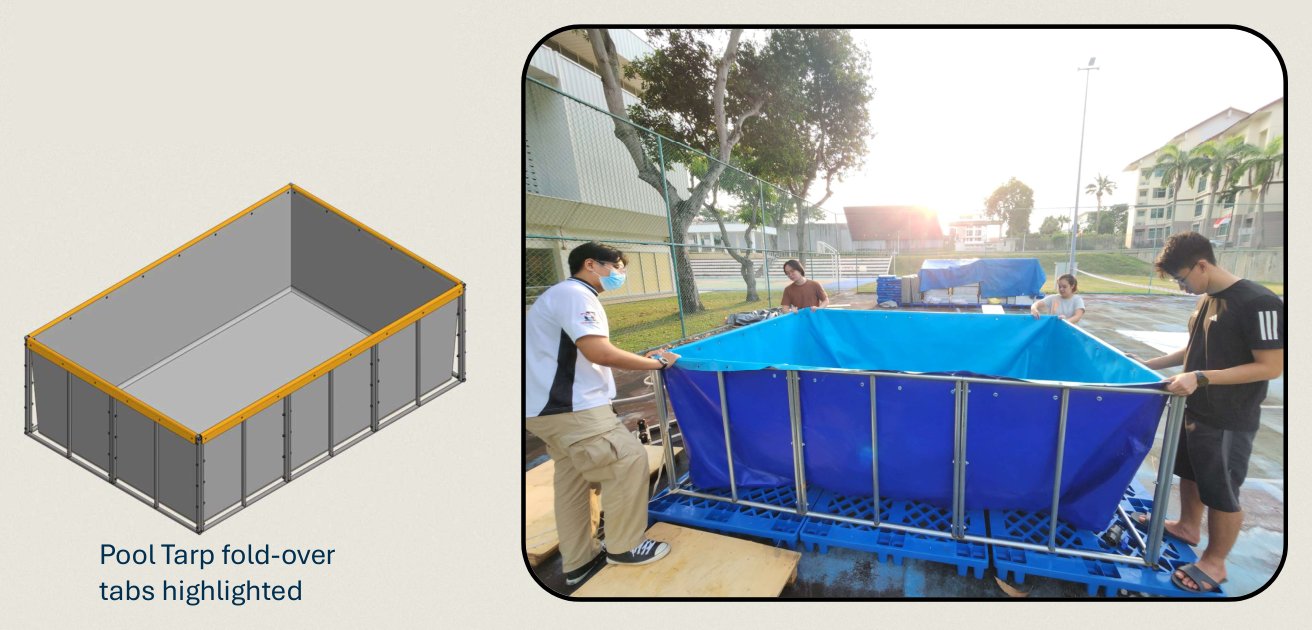
-
Tie one end of the rope to one corner of the Pool.
-
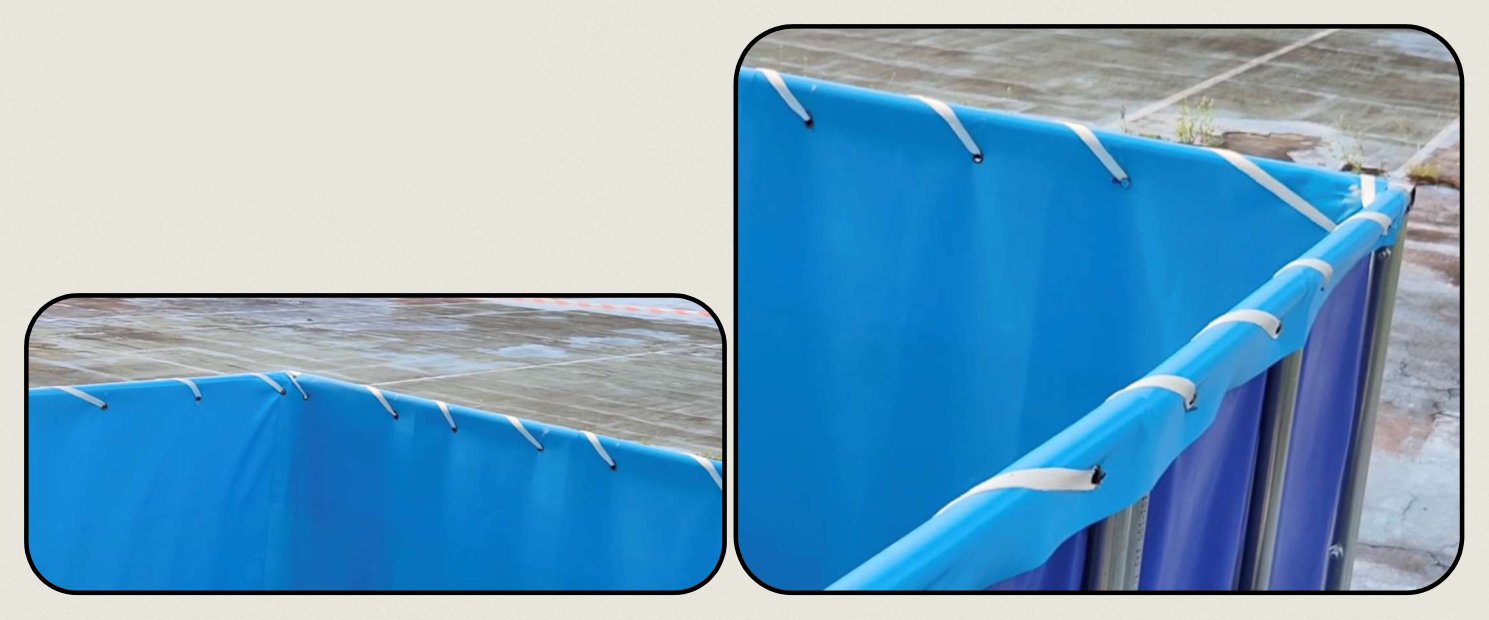
Fold the edge of the tarp over the frame.
-
Line the inner row of eyelets in the tarp up with the outer eyelets.
-
Pass the rope over the edge of the Pool in a spiral.
-
Tie off the rope when the spiral reaches the corner you started at.
-
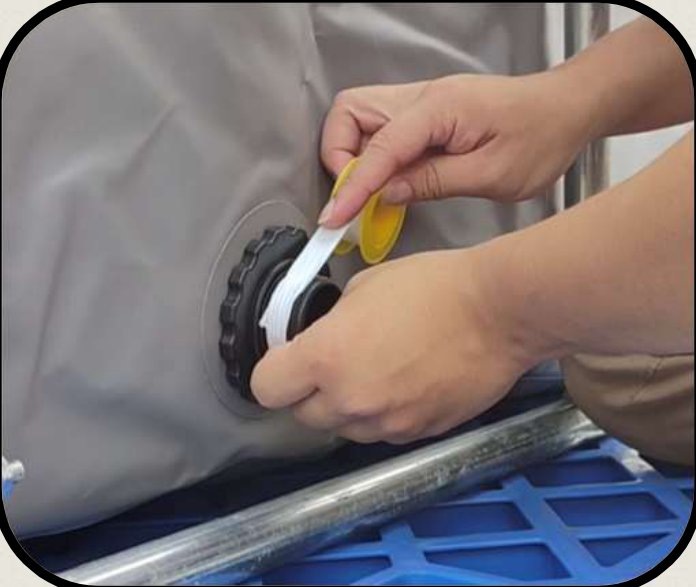
Wrap the thread of the drainage port with a few layers of Teflon tape. Wrap clockwise, so the tape does not unwind when you screw the valve on.
-
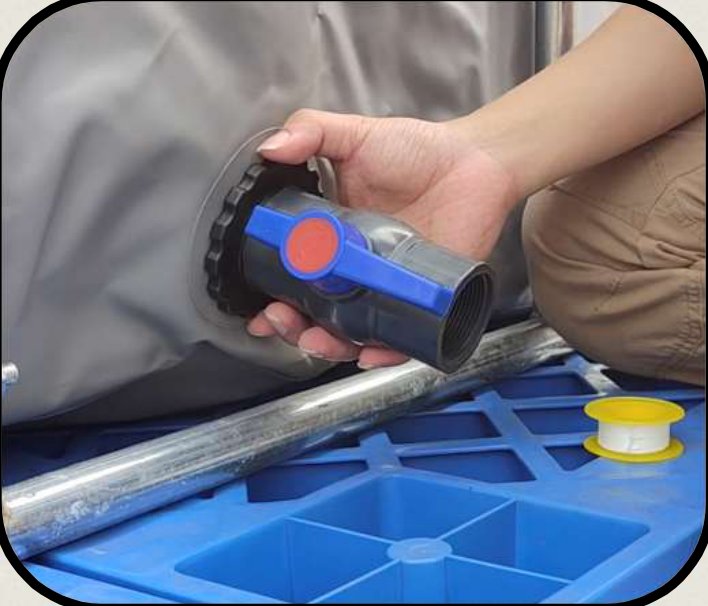
Install the ball valve on the drainage port. Check it is closed.
Part 3: Game elements
-
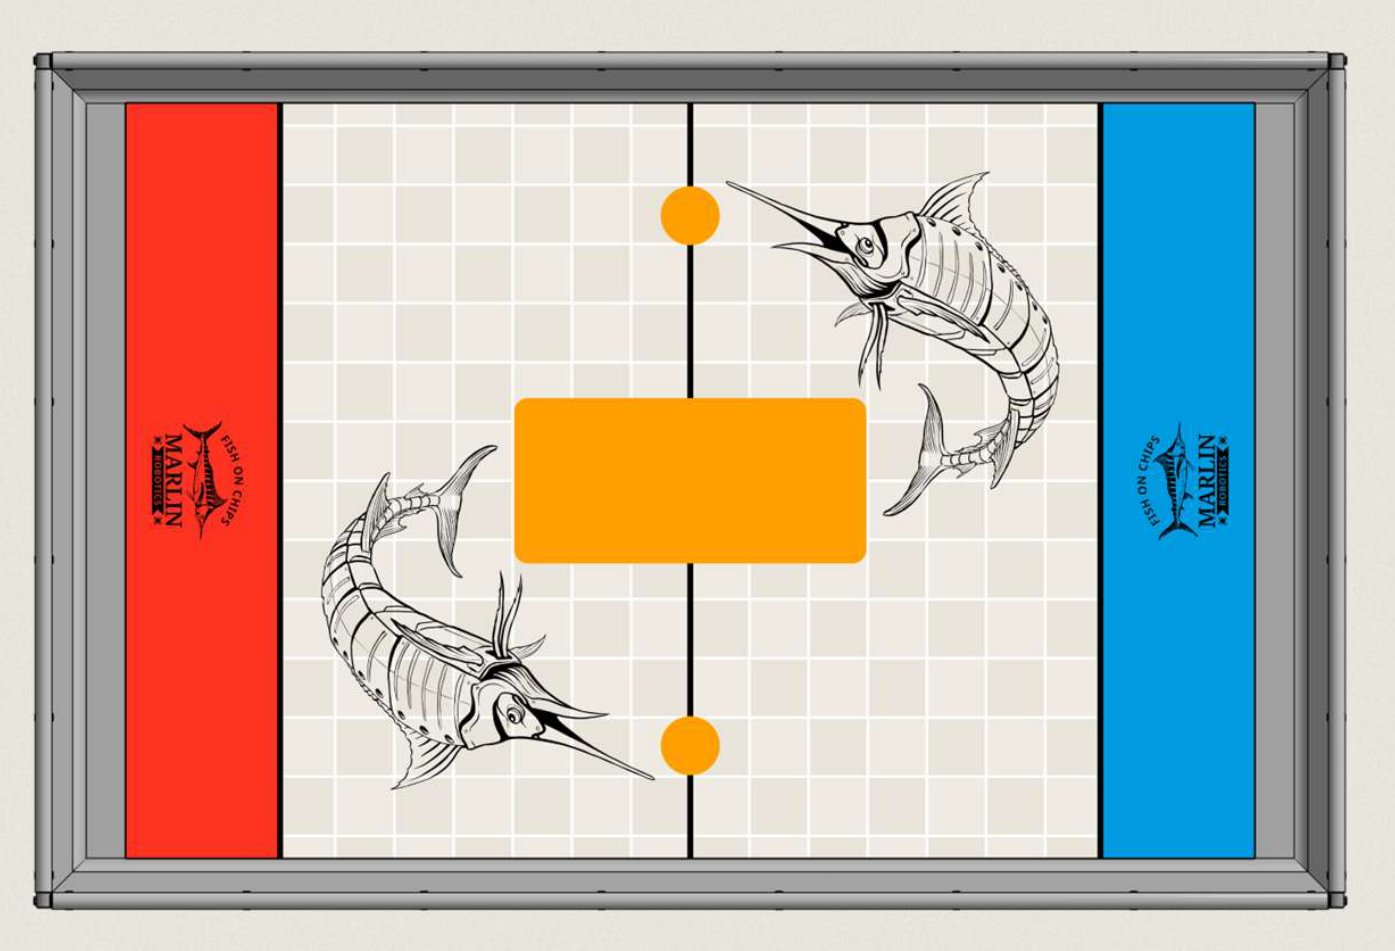
Unroll the Playing Field and lay it on the floor of the Pool, printed side up. It arrives rolled with the white backing outwards.
Centre it as best you can. The edges may not line up exactly with the edges of the Pool floor. That is normal and does not affect play.
-
Assemble and install the Bollards, one on each corner. See Bollard assembly.
-
Assemble the Anchorage and place it in the middle of the Pool. See Anchorage assembly.
-
You may now fill up the pool. We recommend adding pool chlorine if the pool is to be covered and reused.This step can take around 2 hours with a garden hose. Always cover the pool fully if storing with water and dry fully if storing collapsed.
The Pool is ready. See Pool management for the checks officials run before Matches.