Anchorage assembly
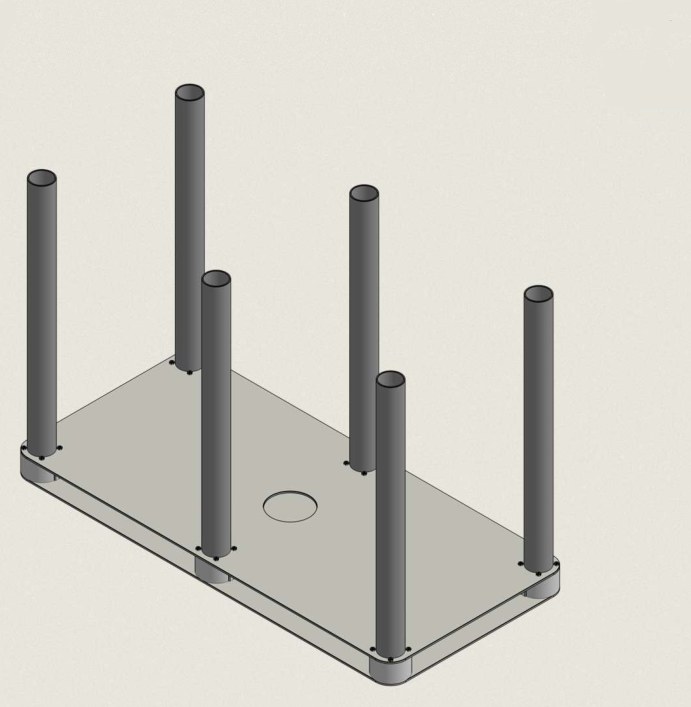
The Anchorage is the structure that sits in the middle of the Pool. It is two acrylic plates held apart by six PVC tubes, bolted through with M4 hardware.
Bill of materials
| Item | Quantity |
|---|---|
| Anchorage Top Plate | 1 pc |
| Anchorage Bottom Plate | 1 pc |
| Corner Tube | 4 pc |
| Middle Tube | 2 pc |
| M4×50 button head bolt | 24 pc |
| M4 hex nut | 24 pc |
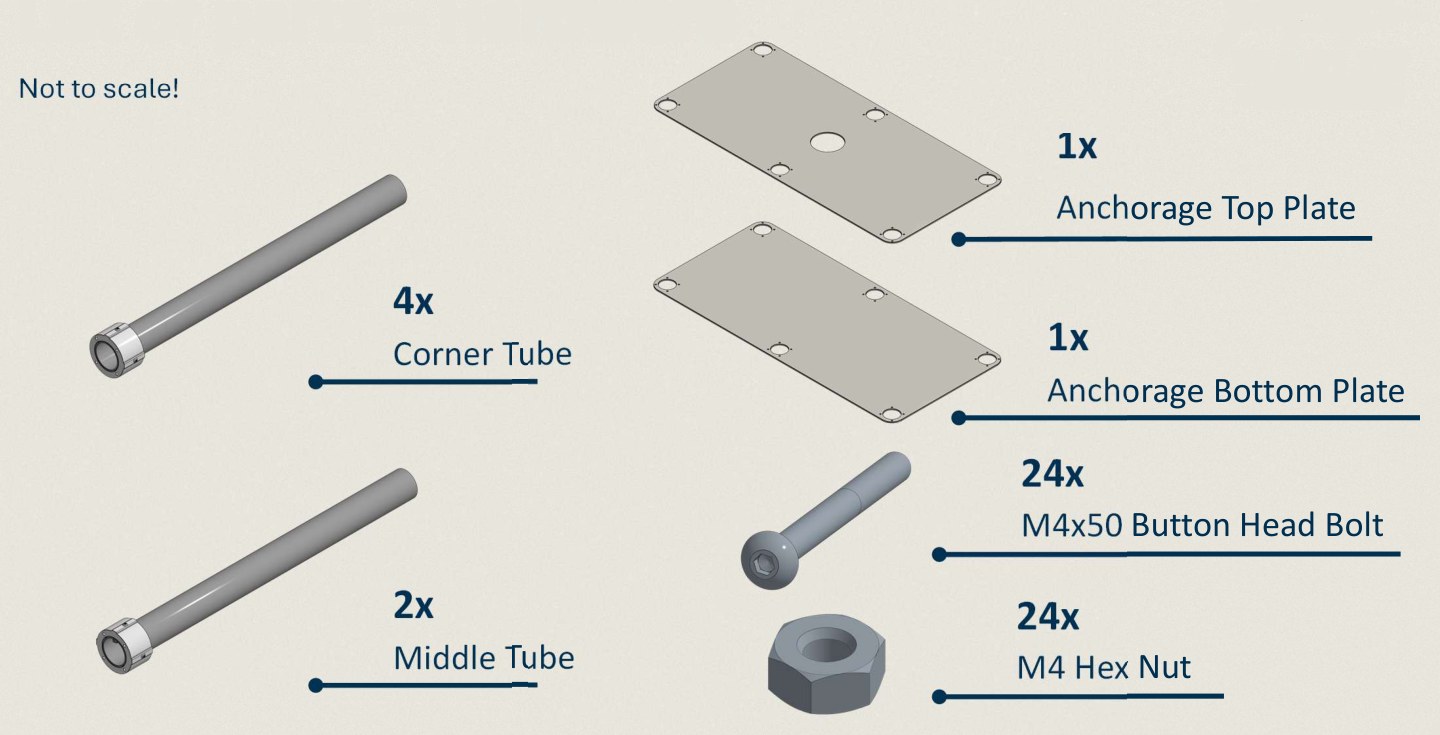
All 24 bolts and nuts are used. There are no spares.
You also need a 2.5 mm hex key for the button head bolts and a 7 mm (or adjustable) spanner to hold the nuts.
Manpower
Recommended: 2 people. One holds the tubes upright while the other fits the top plate.
Corner Tube vs Middle Tube
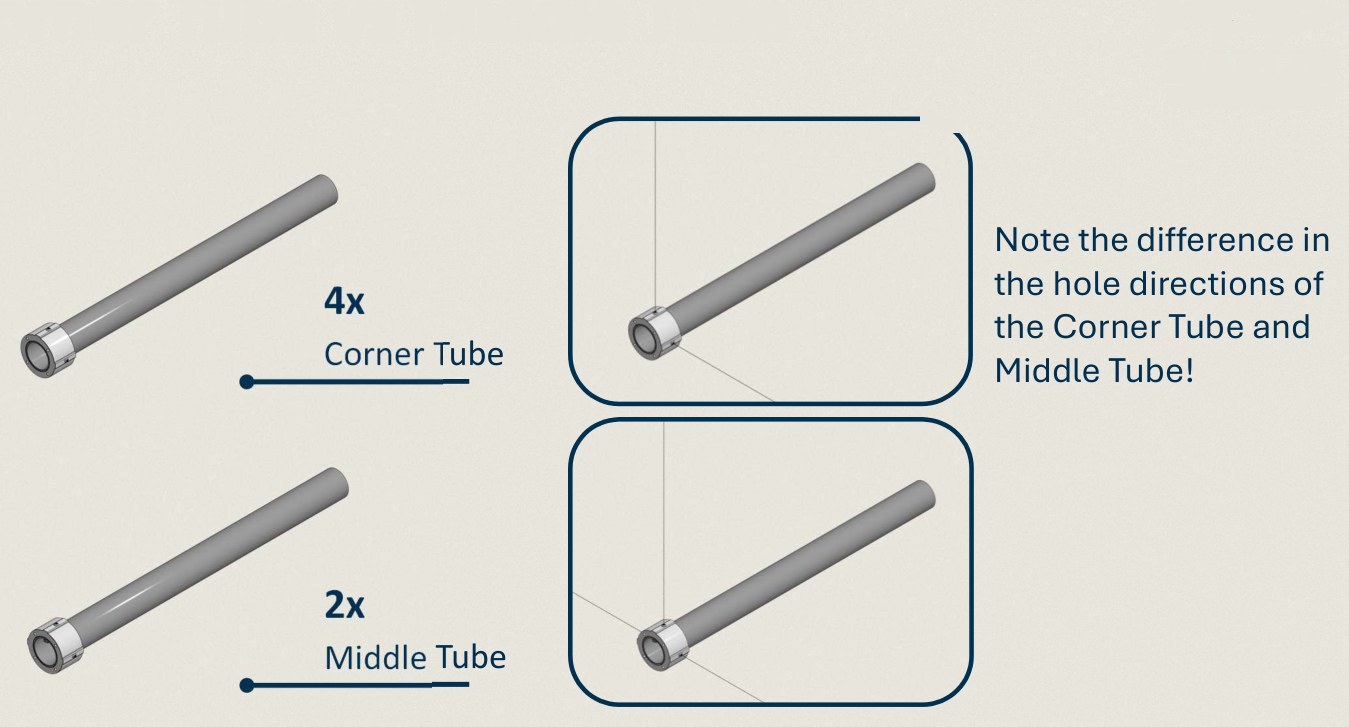
The two tube types are the same length and look identical end on. The holes in their end fittings face different ways: the Corner Tube holes run diagonally across the corner of the plate, the Middle Tube holes run across the plate. Sort them into two piles before you start.
Assembly
-
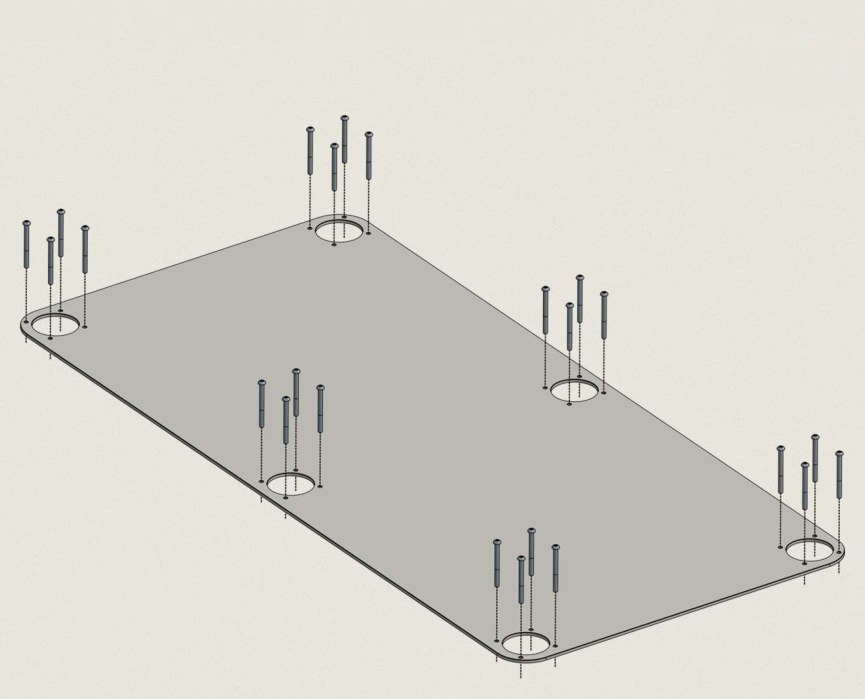
Insert all 24 M4×50 button head bolts up through the Anchorage Bottom Plate, four at each of the six tube positions.
-
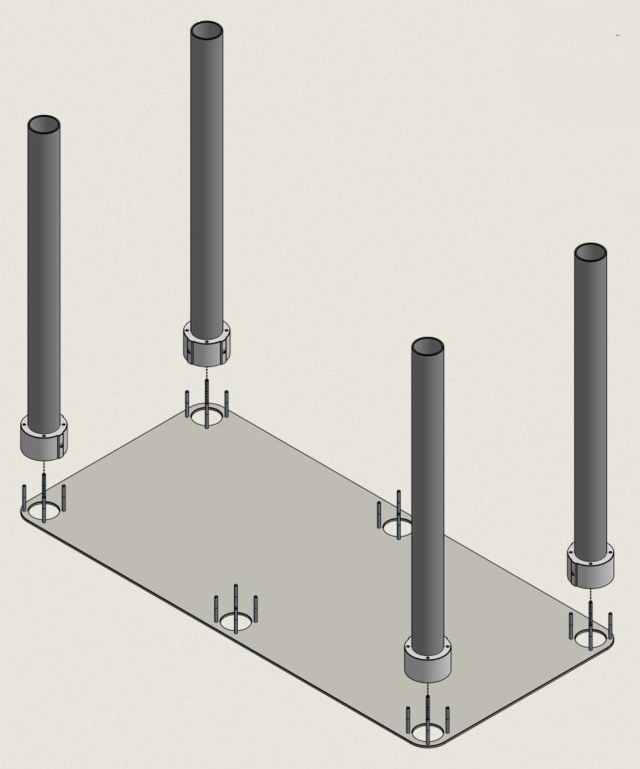
Slide the four Corner Tubes onto the bolts at the four corners of the plate. Do not install the nuts yet.
-
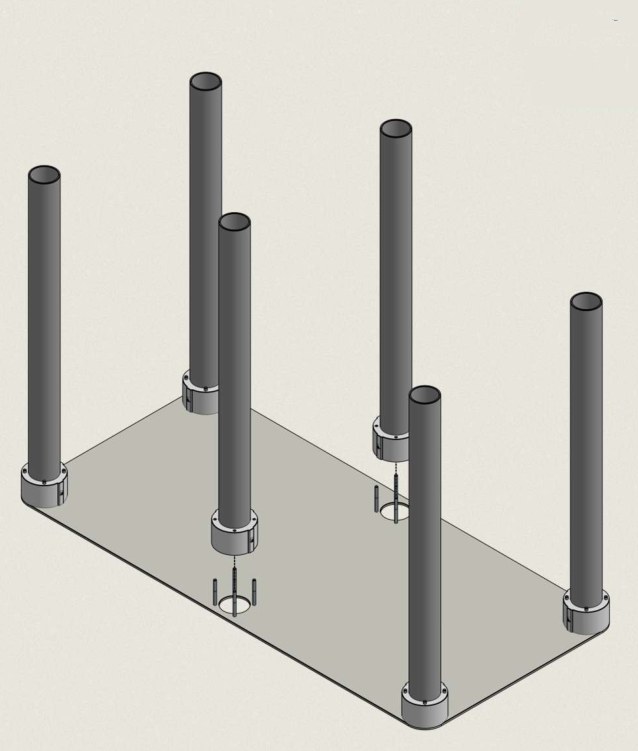
Slide the two Middle Tubes onto the bolts at the two middle positions. Do not install the nuts yet.
-
Lower the Anchorage Top Plate over the six tubes and slide it all the way down, until it rests on the tube end fittings just above the Bottom Plate and every bolt stands through its hole. The tubes end up passing through the Top Plate.
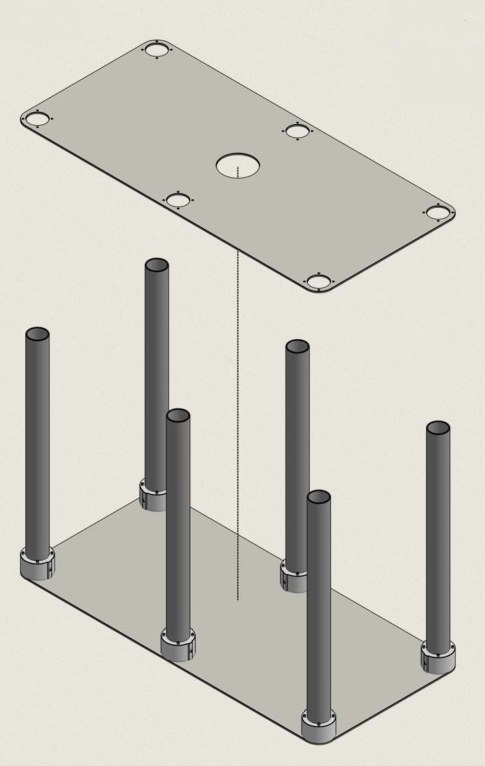
If a bolt will not line up, the tube under it has been rotated. Turn it until the holes in its end fitting match the plate.
-
Fit all 24 M4 hex nuts on top of the Top Plate and tighten them. Hold the nut with the spanner and turn the bolt with the hex key.
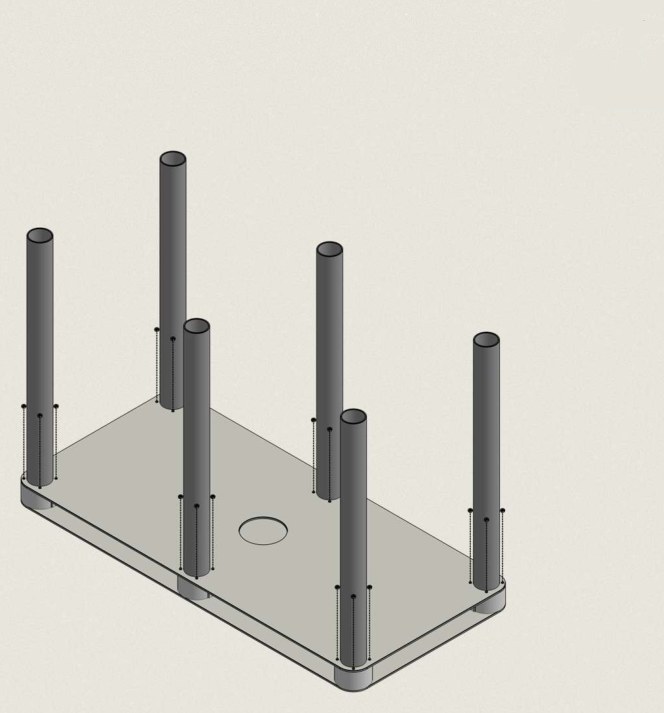
The Anchorage is complete. Place it in the middle of the Pool floor, on top of the Playing Field. See Pool assembly for the rest of the Pool build.