Extension Walkthrough
Now that you have MARLIN installed, we will go through the MARLIN control station. By the end of this page, you will be able to connect to the controller and robot.
The MARLIN control station is divided into 6 cards.
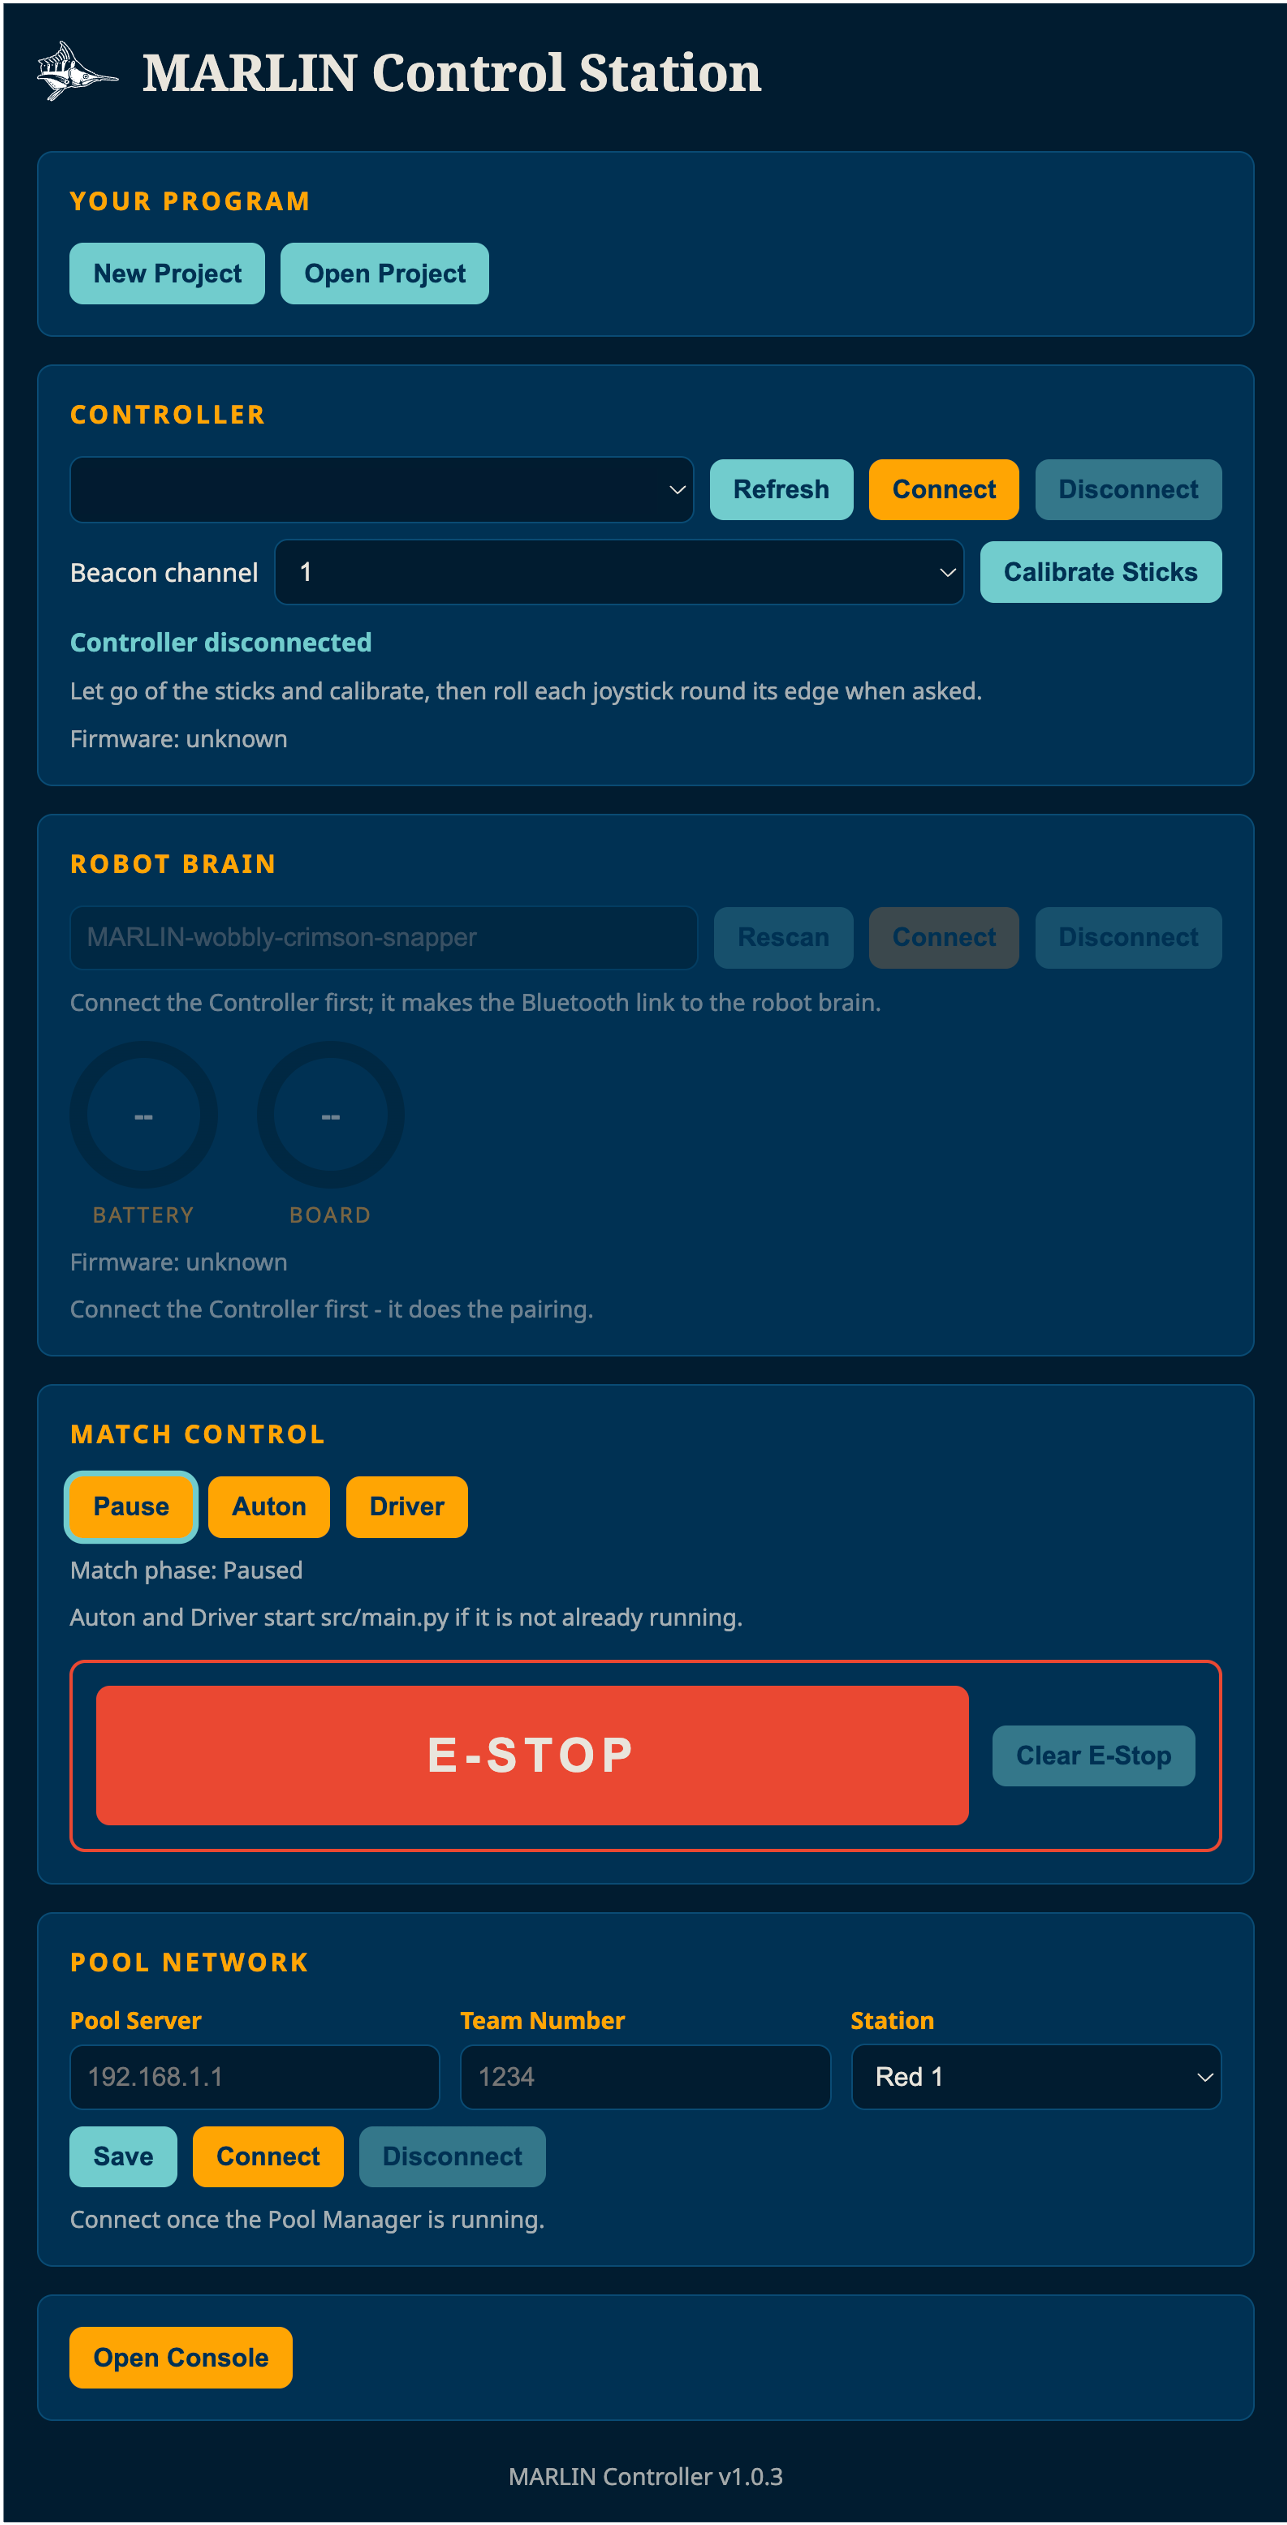
1. Your Program
The Your Program section creates a new MARLIN project or opens an existing one.
| Button | What it does |
|---|---|
| New Project | Create a new MARLIN project from a blank or example template |
| Open Project | Open an existing MARLIN project on your laptop |
A MARLIN project is a folder that contains src/main.py and a project.marlin marker file.

Click New Project to create a new MARLIN project. You can choose between a blank or example project. The example project will contain the basic code needed to use your starter boat. If you want to use an existing project, click Open Project and select your MARLIN project folder.
2. Controller
The Controller section manages the Controller and Beacon connections. When you connect the Controller to your laptop, MARLIN will autodetect the port it is connected to. On macOS, the port name will be displayed as /dev/tty.usbmodemXXXX. On Windows, it will be displayed as COMX port, where X represents a number. In the event that the controller does not connect, follow the steps below:
- Disconnect the Controller from your laptop.
- Click Refresh.
- Note down the list of ports.
- Connect the Controller to your laptop.
- Click Refresh.
- There should be a new port in the list. That is your Controller.
- Select the Controller port.
- Click Connect.
Note
Ensure that you use a USB data cable. Some cables only carry power.
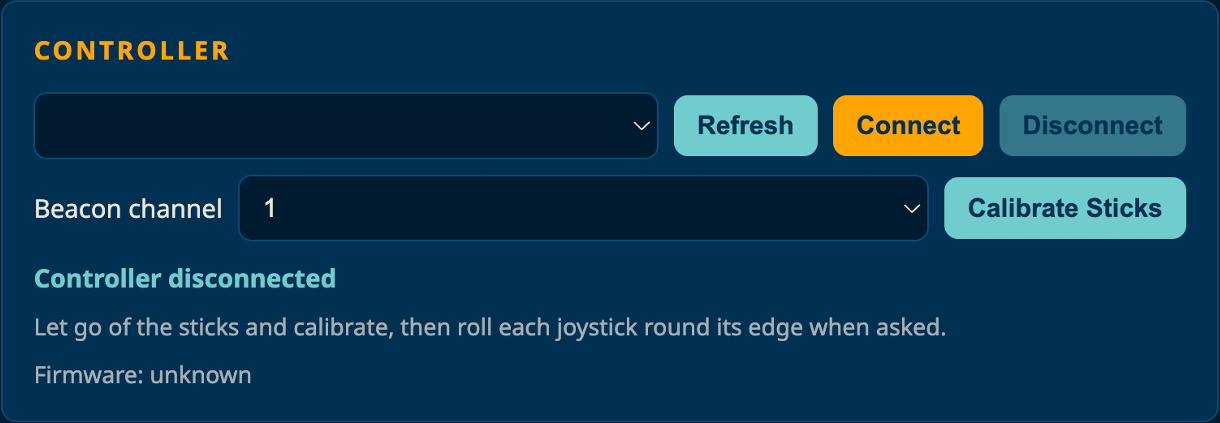
After connecting the Controller, you will be able to pair the Robot Brain.
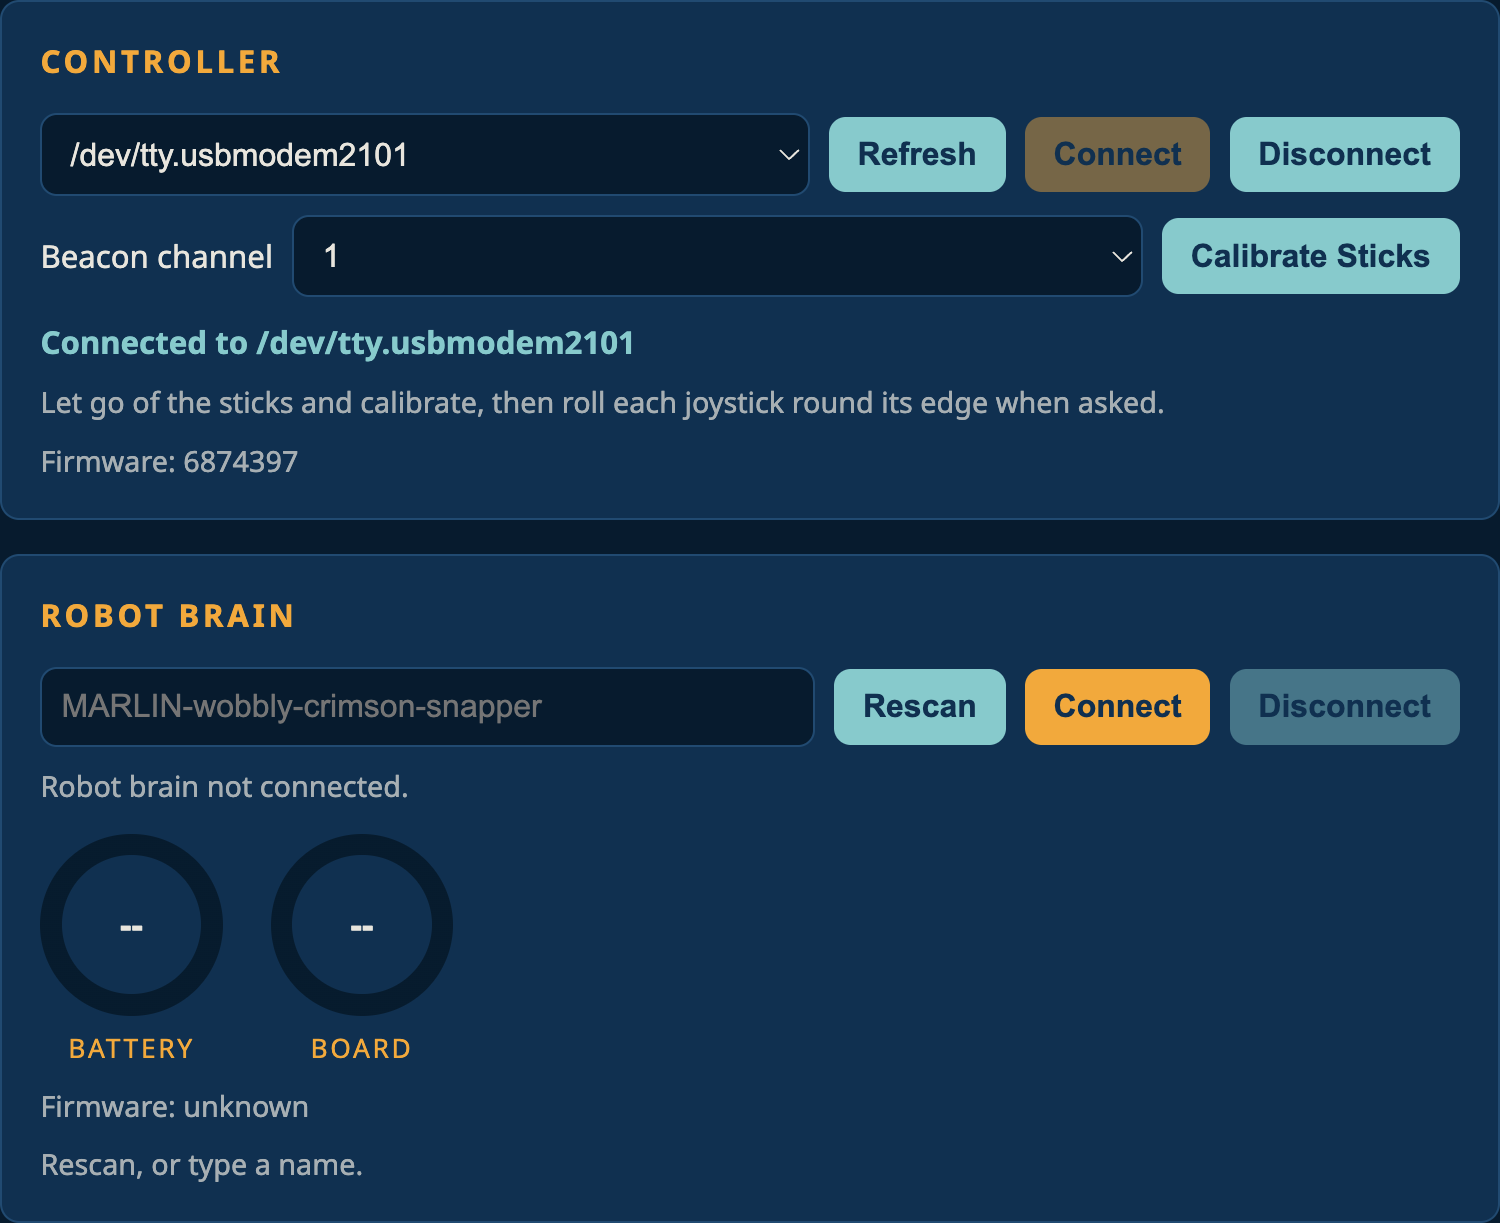
Calibrate Sticks
Once you have connected the Controller, calibrate the Controller sticks. Click Calibrate Sticks, and follow the instructions given. The calibration data will be stored in the project.marlin file.
If stick calibration fails, that means the Controller did not successfully connect to your laptop. Follow the steps above to connect the Controller.
Beacon Channel
Every Beacon has a specific channel number. Select the Beacon channel you are using. This will be the channel the LoRa module listens to. If you select the wrong channel, the LoRa module will not output the correct data.
3. Robot Brain
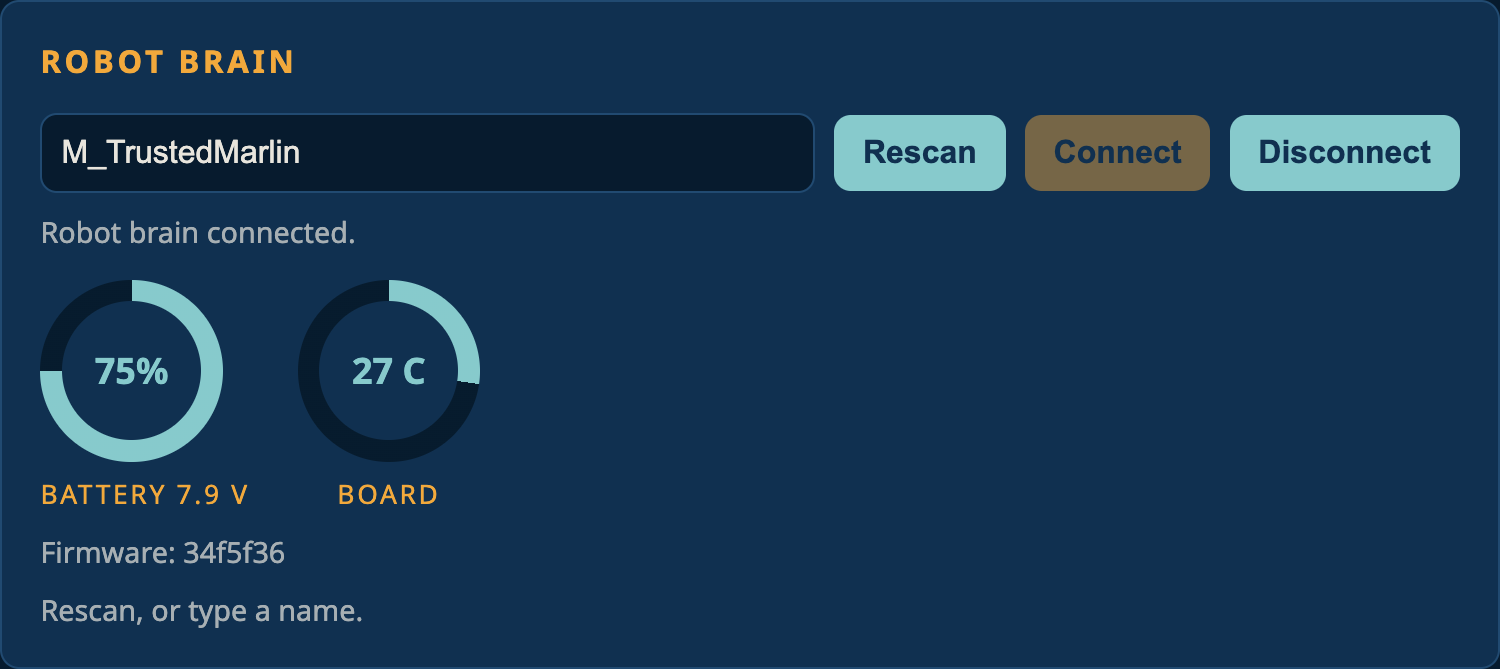
After connecting the Controller, the Robot Brain section will be accessible. Without a Controller, you will not be able to connect to the Robot Brain. The Robot Brain section manages the pairing of Controller to the robot brain via Bluetooth and displays its live telemetry. To pair with the Robot Brain, you should:
- Press and hold the pairing button on the Robot Brain until the LED rapidly flashes.
- Enter the name engraved on the side of the Robot Brain. The Robot Brain's Bluetooth name takes the form
M_<Name>. - Click Connect.
- The Battery and Board dials should be showing values.
Warning
Ensure that the battery is sufficiently charged before using. If the battery level is too low, the Robot Brain will not be able to fully function.
4. Match Control
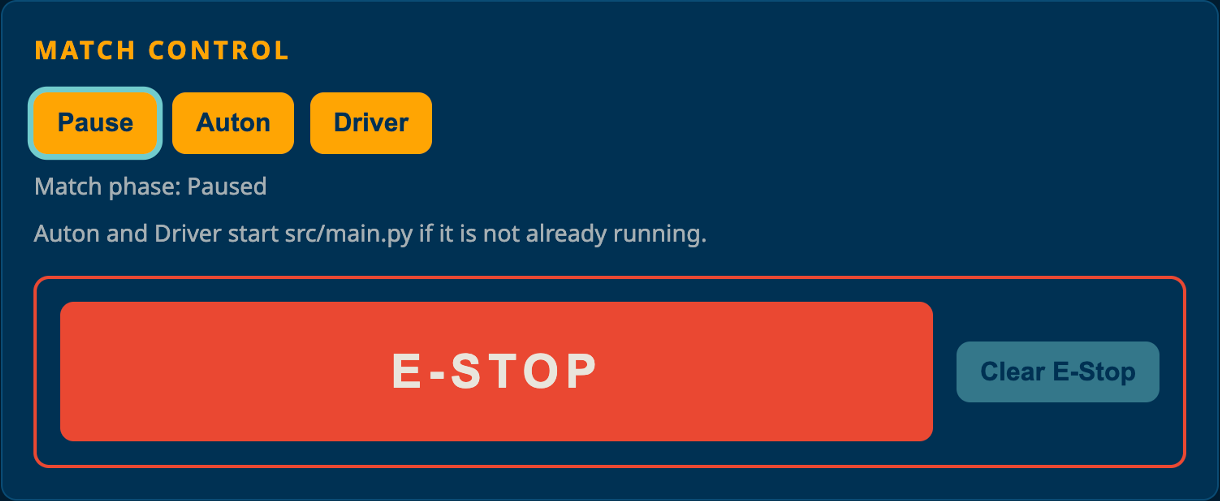
The Match Control section controls the state of the Robot.
| Control | Robot behaviour |
|---|---|
| Pause | Idle or pause Robot |
| Auton | Runs autonomous(robot) |
| Driver | Runs driver(robot) |
| E-STOP | Emergency stop Robot |
| Clear E-Stop | Clear E-Stop when it is safe |
The "Match phase" line under the buttons shows what the robot is doing right now (for example "Match phase: Paused"), and highlights the matching button.
Warning
In the event of unsafe situations, E-Stop the Robot immediately. Only clear E-Stop when it is safe.
5. Pool Network
The Pool Network section connects your laptop to the Pool Server. Leave the server URL blank unless connecting to a Pool Server.
| Field | What to enter |
|---|---|
| Pool server | Pool Server Address, such as 192.168.1.1:3000 |
| Team number | Your team or robot number |
| Station | Your assigned driver station (Red 1, Red 2, Blue 1, or Blue 2) |
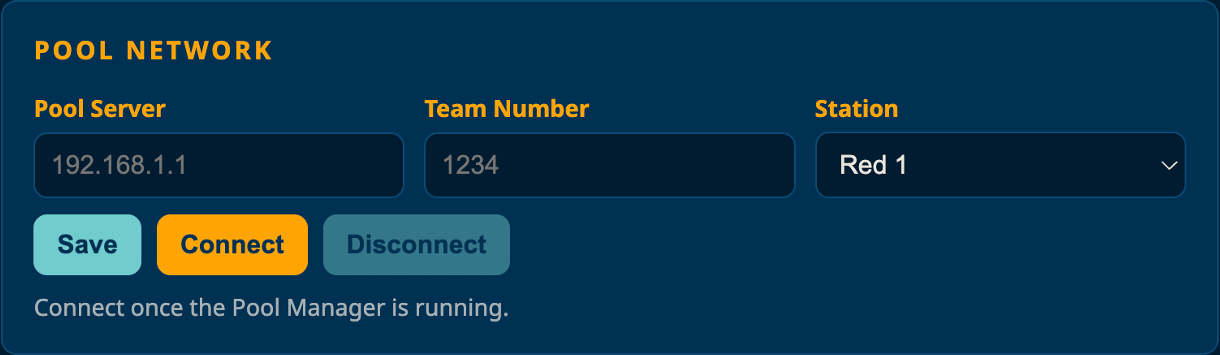
This section is only used with a MARLIN Pool Server. For usage without a Pool Server, leave this section blank.
After filling in the fields, click Save. They are stored in VS Code settings. Connect to connect to the Pool Server. If the URL is wrong or the Pool Server is unavailable, the console may show repeated connection errors.
Note
Ensure that your laptop is on the same Wi-Fi network as the Pool Server. Before the competition, you will be provided with the Pool Server Address.
Once you have connected to the Pool Server, the local Pause, Auton, and Driver buttons are disabled. The Pool Server controls the match phases.
Disconnect when you are not using the Pool Server.
6. MARLIN Console
Console messages appear in their own MARLIN Console panel, not in the control station itself. Open it with the Open Console button at the bottom of the control station.

Scroll to the bottom of the control station to find Open Console. This
screenshot also shows what a freshly created project looks like: src/main.py
with empty autonomous() and driver() functions, ready for your code.
The console has a source filter (All messages, [EXT] Extension, [CON] Controller, [POOL] Field, [OUT] Student script, [IN] Console input), a Clear button, and an input box so you can type a value into your program's input() call while it is running. [OUT] is your own program's output.
Read the newest message first when something goes wrong. Categories you will see include:
[EXT]extension-level problems, such as Python failing to importmarlin.[CON]Controller/serial activity, including controller button and trigger presses when connected.[POOL]pool server connection and match messages.[OUT]your running program's own output.
Note
The exact wording of individual log lines is implementation detail and can change between releases; the categories above are the stable part.
Next: Try out the example code in Your First Program.