MARLIN extension UI tour
The MARLIN extension's control station lives inside VS Code. Use it to connect the Controller, pair the robot brain, open or create a MARLIN project, start the Autonomous or Driver Controlled Period, watch logs, and receive match commands during a match.
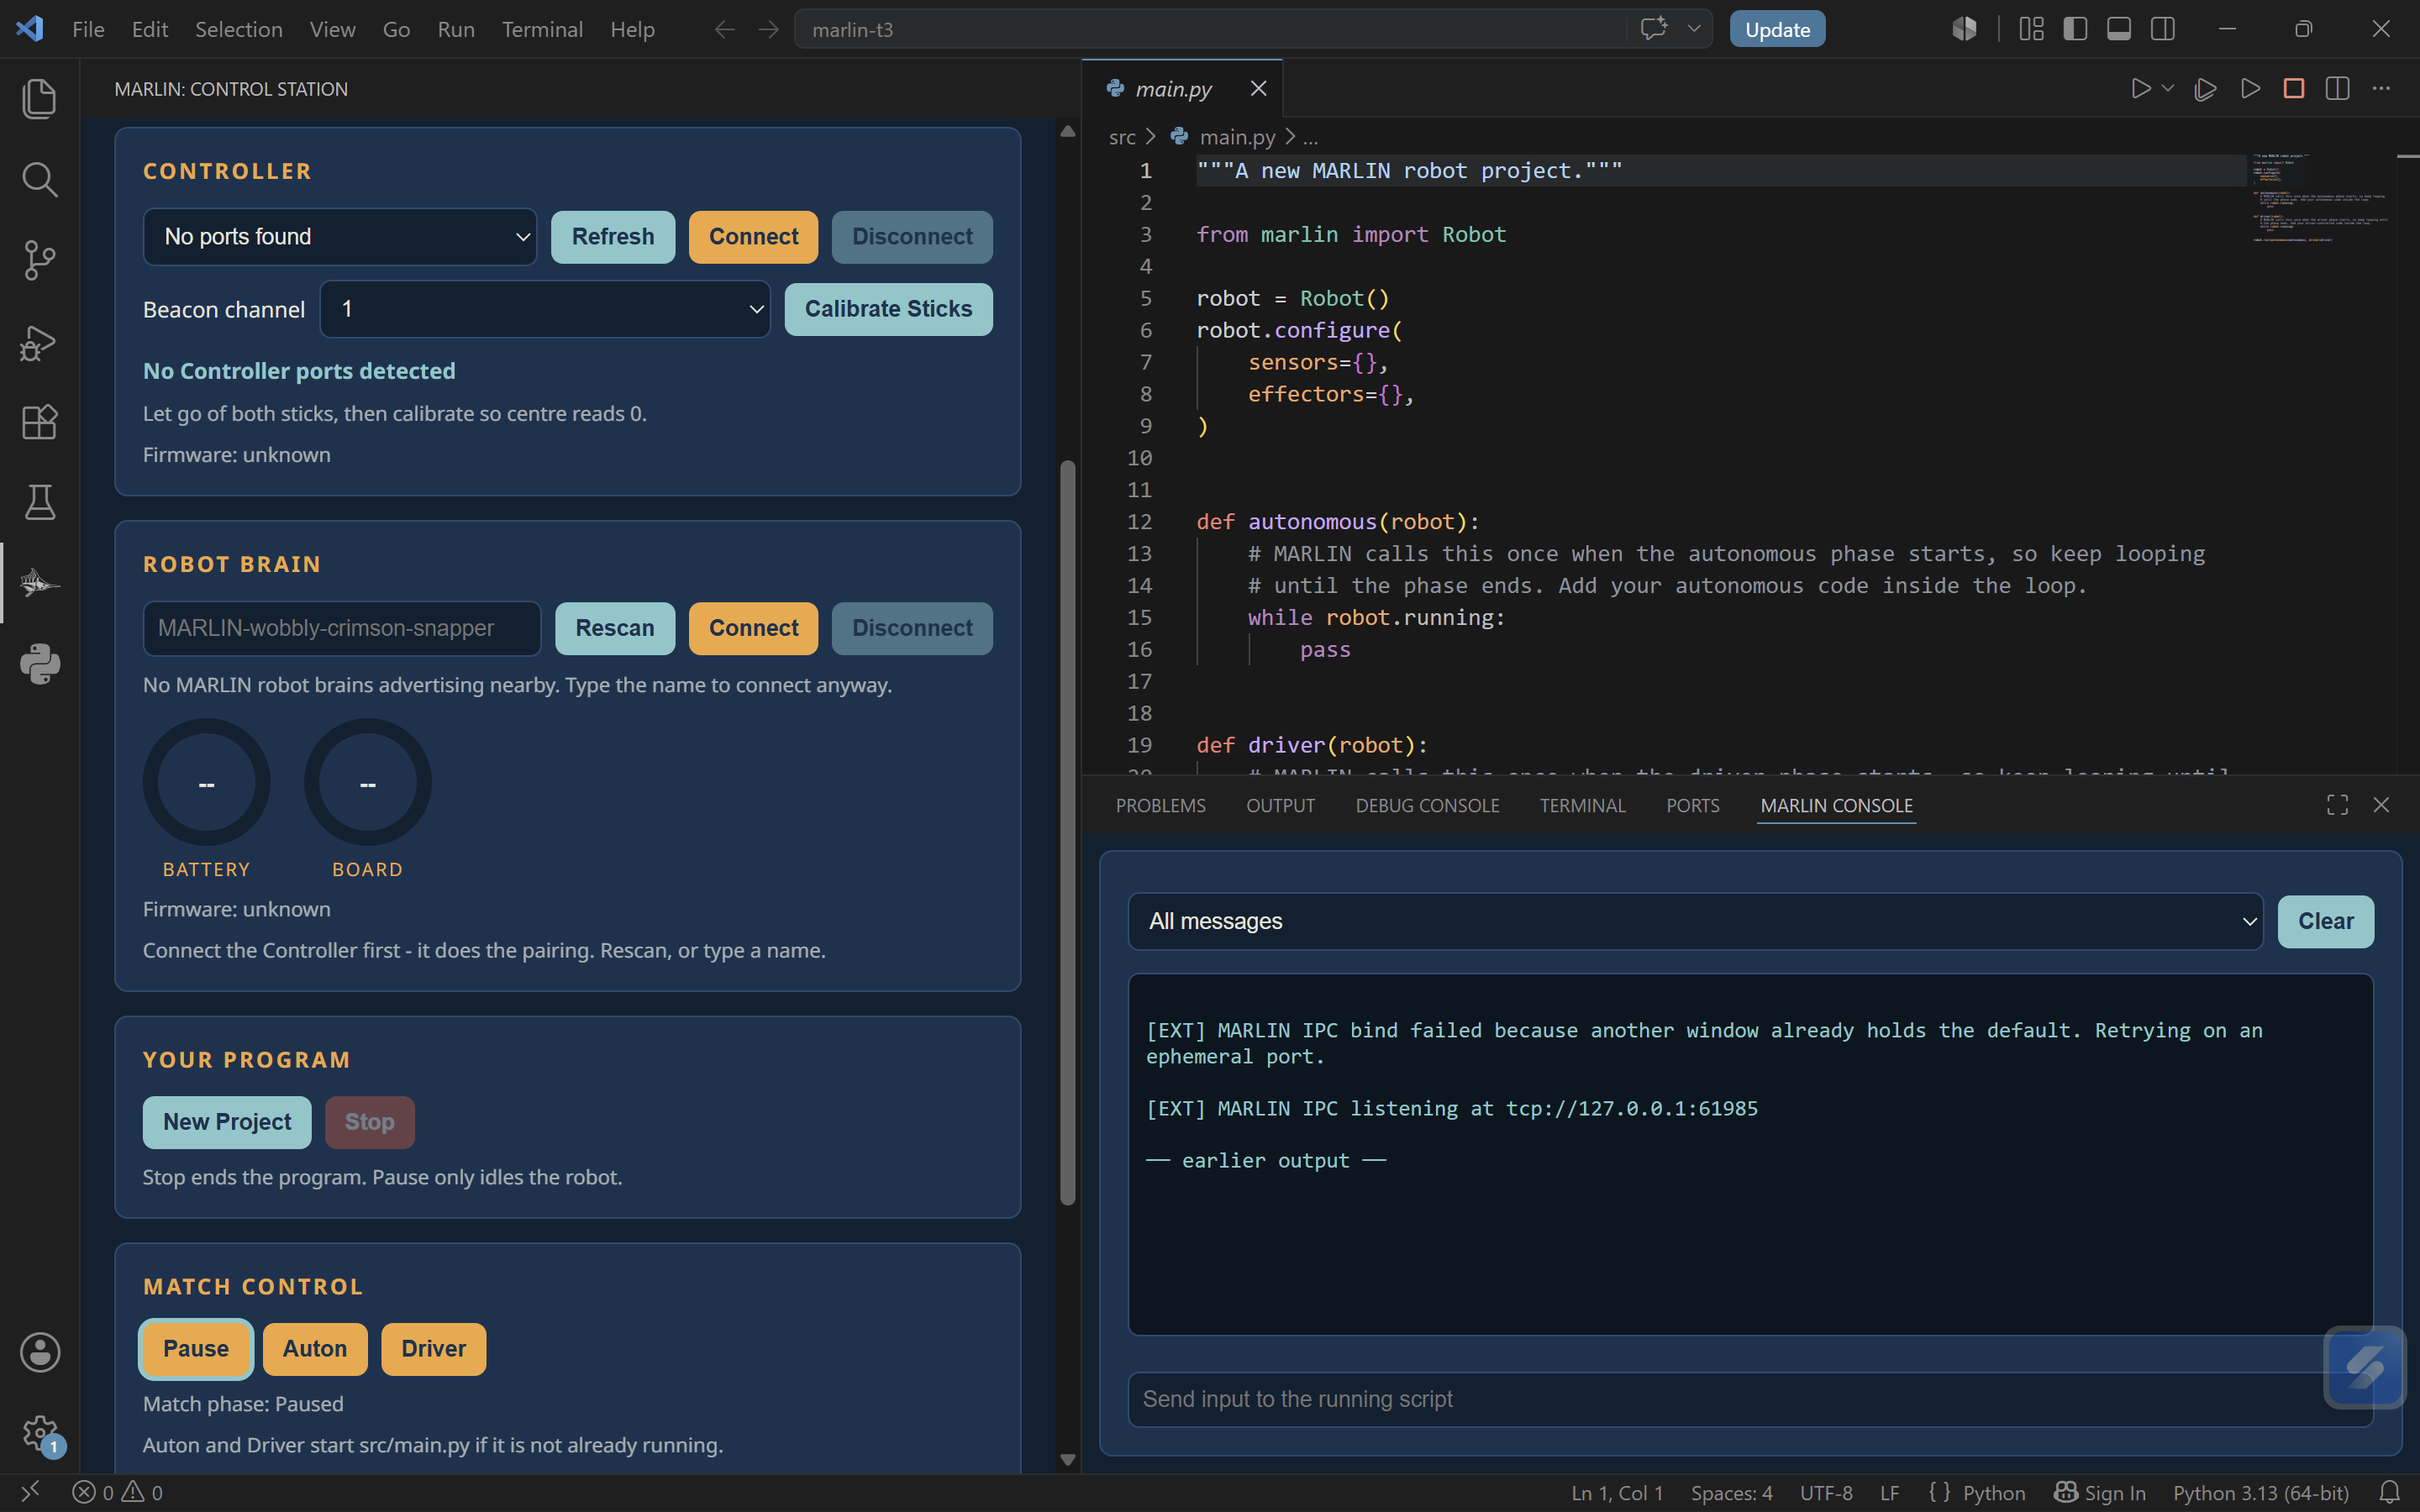
The MARLIN activity-bar icon opens the control station. The control station is where you enter pool server settings, connect the Controller, pair the robot brain, create or open your MARLIN project, and start a match phase. Console messages appear in a separate MARLIN Console panel, opened from the control station's Open Console button (or the MARLIN: Open Console command).
Control station map
The control station is divided into five cards:
| Section | Use it for |
|---|---|
| Field Network | Connecting to the event pool server during competition |
| Controller | Finding and connecting the Controller over USB, calibrating the analog sticks, and setting the LoRa beacon channel |
| Robot Brain | Pairing the Controller to a robot brain over Bluetooth, and reading its battery and board-temperature dials |
| Your Program | Creating a new MARLIN project, and stopping the running program |
| Match Control | Testing Auton, Driver, Pause, and E-Stop locally |
Most practice sessions use only Controller, Robot Brain, Your Program, and Match Control. The Field Network section is used when an event pool server runs the match.
Console messages are not one of these five cards. They open in their own MARLIN Console panel at the bottom of the window.
Field Network
The Field Network section connects your laptop to the event pool server. Leave the server URL blank when you are practicing without a pool server.
| Field | What to enter |
|---|---|
| MARLIN server | Pool server URL, such as http://192.168.1.25:3000 |
| Team number | Your team or robot number |
| Station | Your assigned driver station (Red 1, Red 2, Blue 1, or Blue 2) |
There is no separate alliance field. The station you pick already says Red or Blue, and the extension reads your alliance from it.
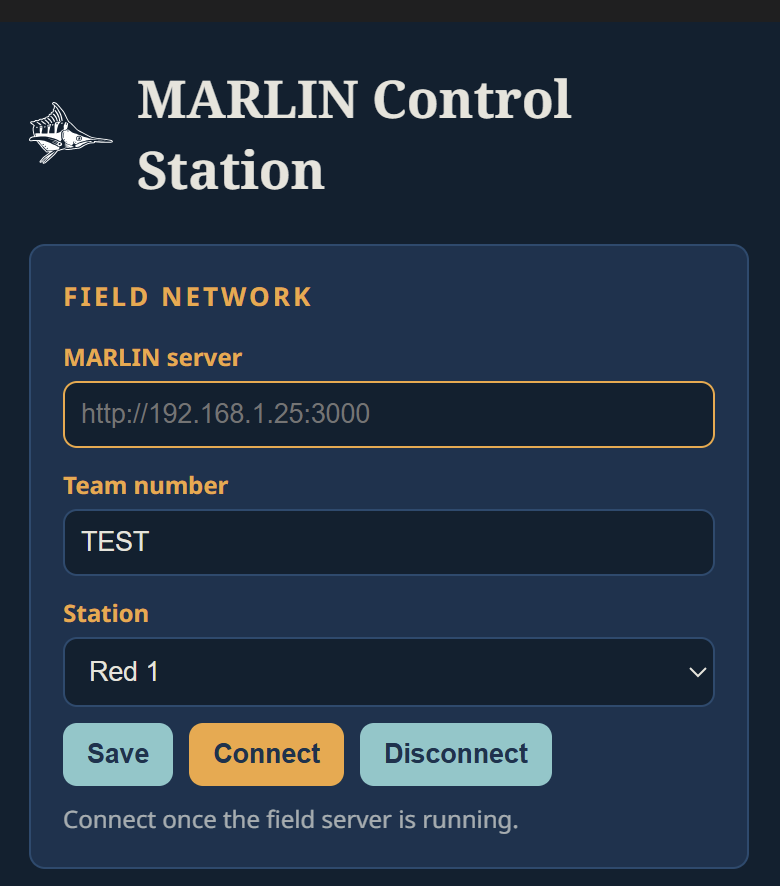
Use this section only when a MARLIN pool server is running. For normal practice without a pool server, leave the server field blank.
Click Save after editing these fields. Save writes them to your VS Code settings, and it reconnects immediately if the station is already connected. If the URL is wrong, the console may show repeated connection errors. Clear the server URL when you are not using the pool server.
While the extension is connected to a pool server, the local Pause, Auton, and Driver buttons and the editor title-bar icons are disabled. The pool dashboard is the only thing that can start a phase.
Controller
The Controller section manages the USB connection between your laptop and the Controller. It also holds analog-stick calibration and the LoRa beacon channel.
- Plug the Controller into the laptop.
- Click Refresh.
- Select the Controller port.
- Click Connect.
The selected port is the Controller, not the robot. The Controller communicates with the robot separately.
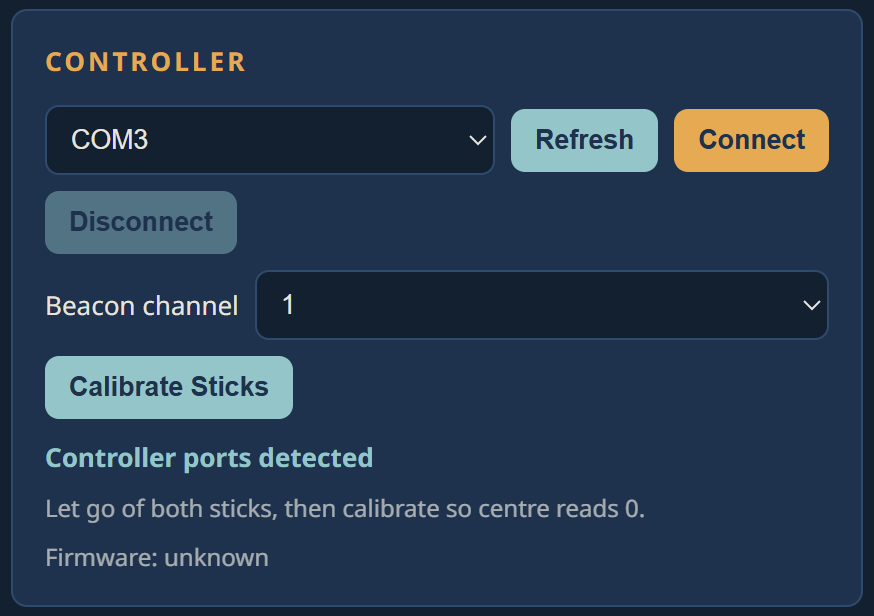
After Refresh, choose the Controller port from the dropdown and click Connect. Once connected, click Calibrate Sticks: it first samples the sticks at rest, with your hands off the panel, so centre reads zero. Then it asks you to roll each joystick around its edge so a full push reads ±100. The resulting calibration is saved into your project. See Calibrate Sticks for the full run. The Beacon channel dropdown sets the LoRa radio channel (1–41); a channel assigned by the pool server during a match overwrites this value.
Robot Brain
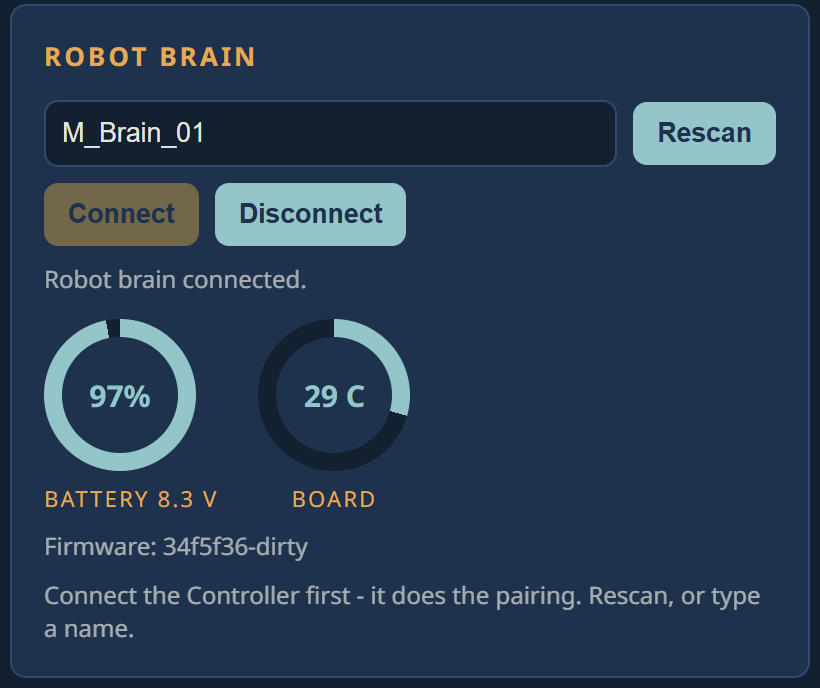
The Robot Brain section pairs the Controller to a robot brain over Bluetooth and shows its live telemetry. To pair: press the pairing button on the robot brain, click Rescan, pick your brain from the list, then click Connect.
Two dials show the robot brain's battery voltage and its board temperature once it is paired.
The Controller must be connected first. It is what does the Bluetooth pairing.
Your Program
The Your Program section creates a MARLIN project and stops the running program.
| Button | What it does |
|---|---|
| New Project | Create a new MARLIN project from a blank or tank-drive example template |
| Stop | Stop the running program |
A MARLIN project is a folder containing src/main.py and a project.marlin marker file; opening one in VS Code makes the Start Auton, Start Driver, and Stop icons appear in the editor title bar. Starting Auton or Driver from the icons in the top right corner or from Match Control launches src/main.py itself if it is not already running, so there is nothing to press before testing a phase.
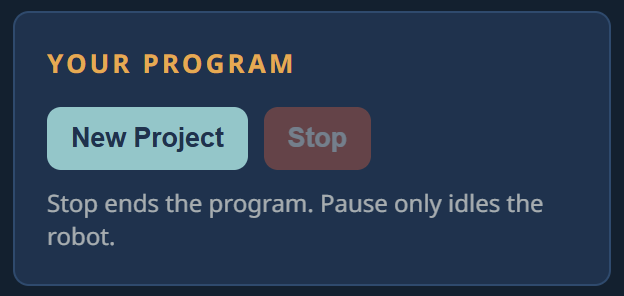
Click New Project to scaffold src/main.py; if you already have a project
open, opening its folder in VS Code is enough. No import step is required.
New Project is also available from the Command Palette as
MARLIN: Create New MARLIN Project.
The editor title-bar icons are the same commands as the Match Control buttons, and are also reachable from the Command Palette as MARLIN: Start Auton, MARLIN: Start Driver, and MARLIN: Stop.
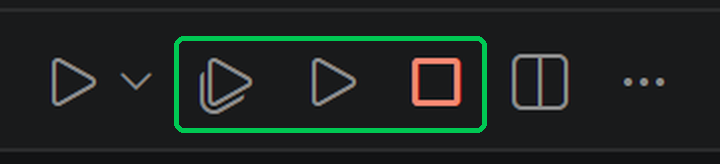
Left to right inside the green box: Start Auton, Start Driver, Stop. The play button to the left of the box is VS Code's own Run Python File button. It runs your file without the MARLIN link configured, so do not use it.
Match Control
The Match Control section tells MARLIN which phase is active.
| Control | Robot behaviour |
|---|---|
| Pause | Idle or pause robot output |
| Auton | Run the autonomous(robot) callback |
| Driver | Run the driver(robot) callback |
| E-STOP | Emergency stop robot output |
| Clear E-Stop | Clear E-Stop when it is safe |
A "Match phase" line under the buttons shows what the robot is doing right now (for example "Match phase: Paused"), and highlights the matching button.
Warning
Treat E-Stop as a real safety control. Clear it only after the robot and Pool are safe.
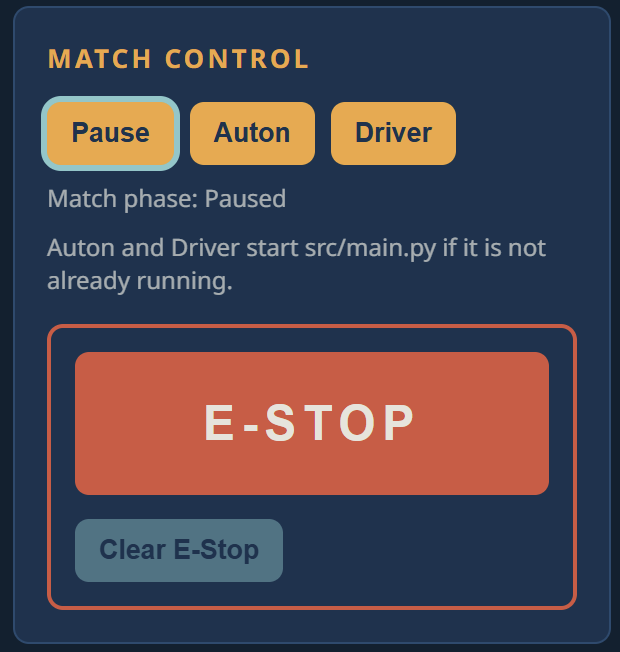
The Match Control buttons are near the bottom of the control station. The red E-STOP button is the fastest way to stop robot output during local testing. Clear E-Stop stays disabled until an E-Stop is active. While the extension is still connected to a pool server, only the pool dashboard can clear a pool-issued E-Stop; this button cannot. If the pool connection drops, this button can then clear that E-Stop locally.
MARLIN Console
Console messages appear in their own MARLIN Console panel, not in the control station itself. Open it with the Open Console button at the bottom of the control station, or the MARLIN: Open Console command from the Command Palette.
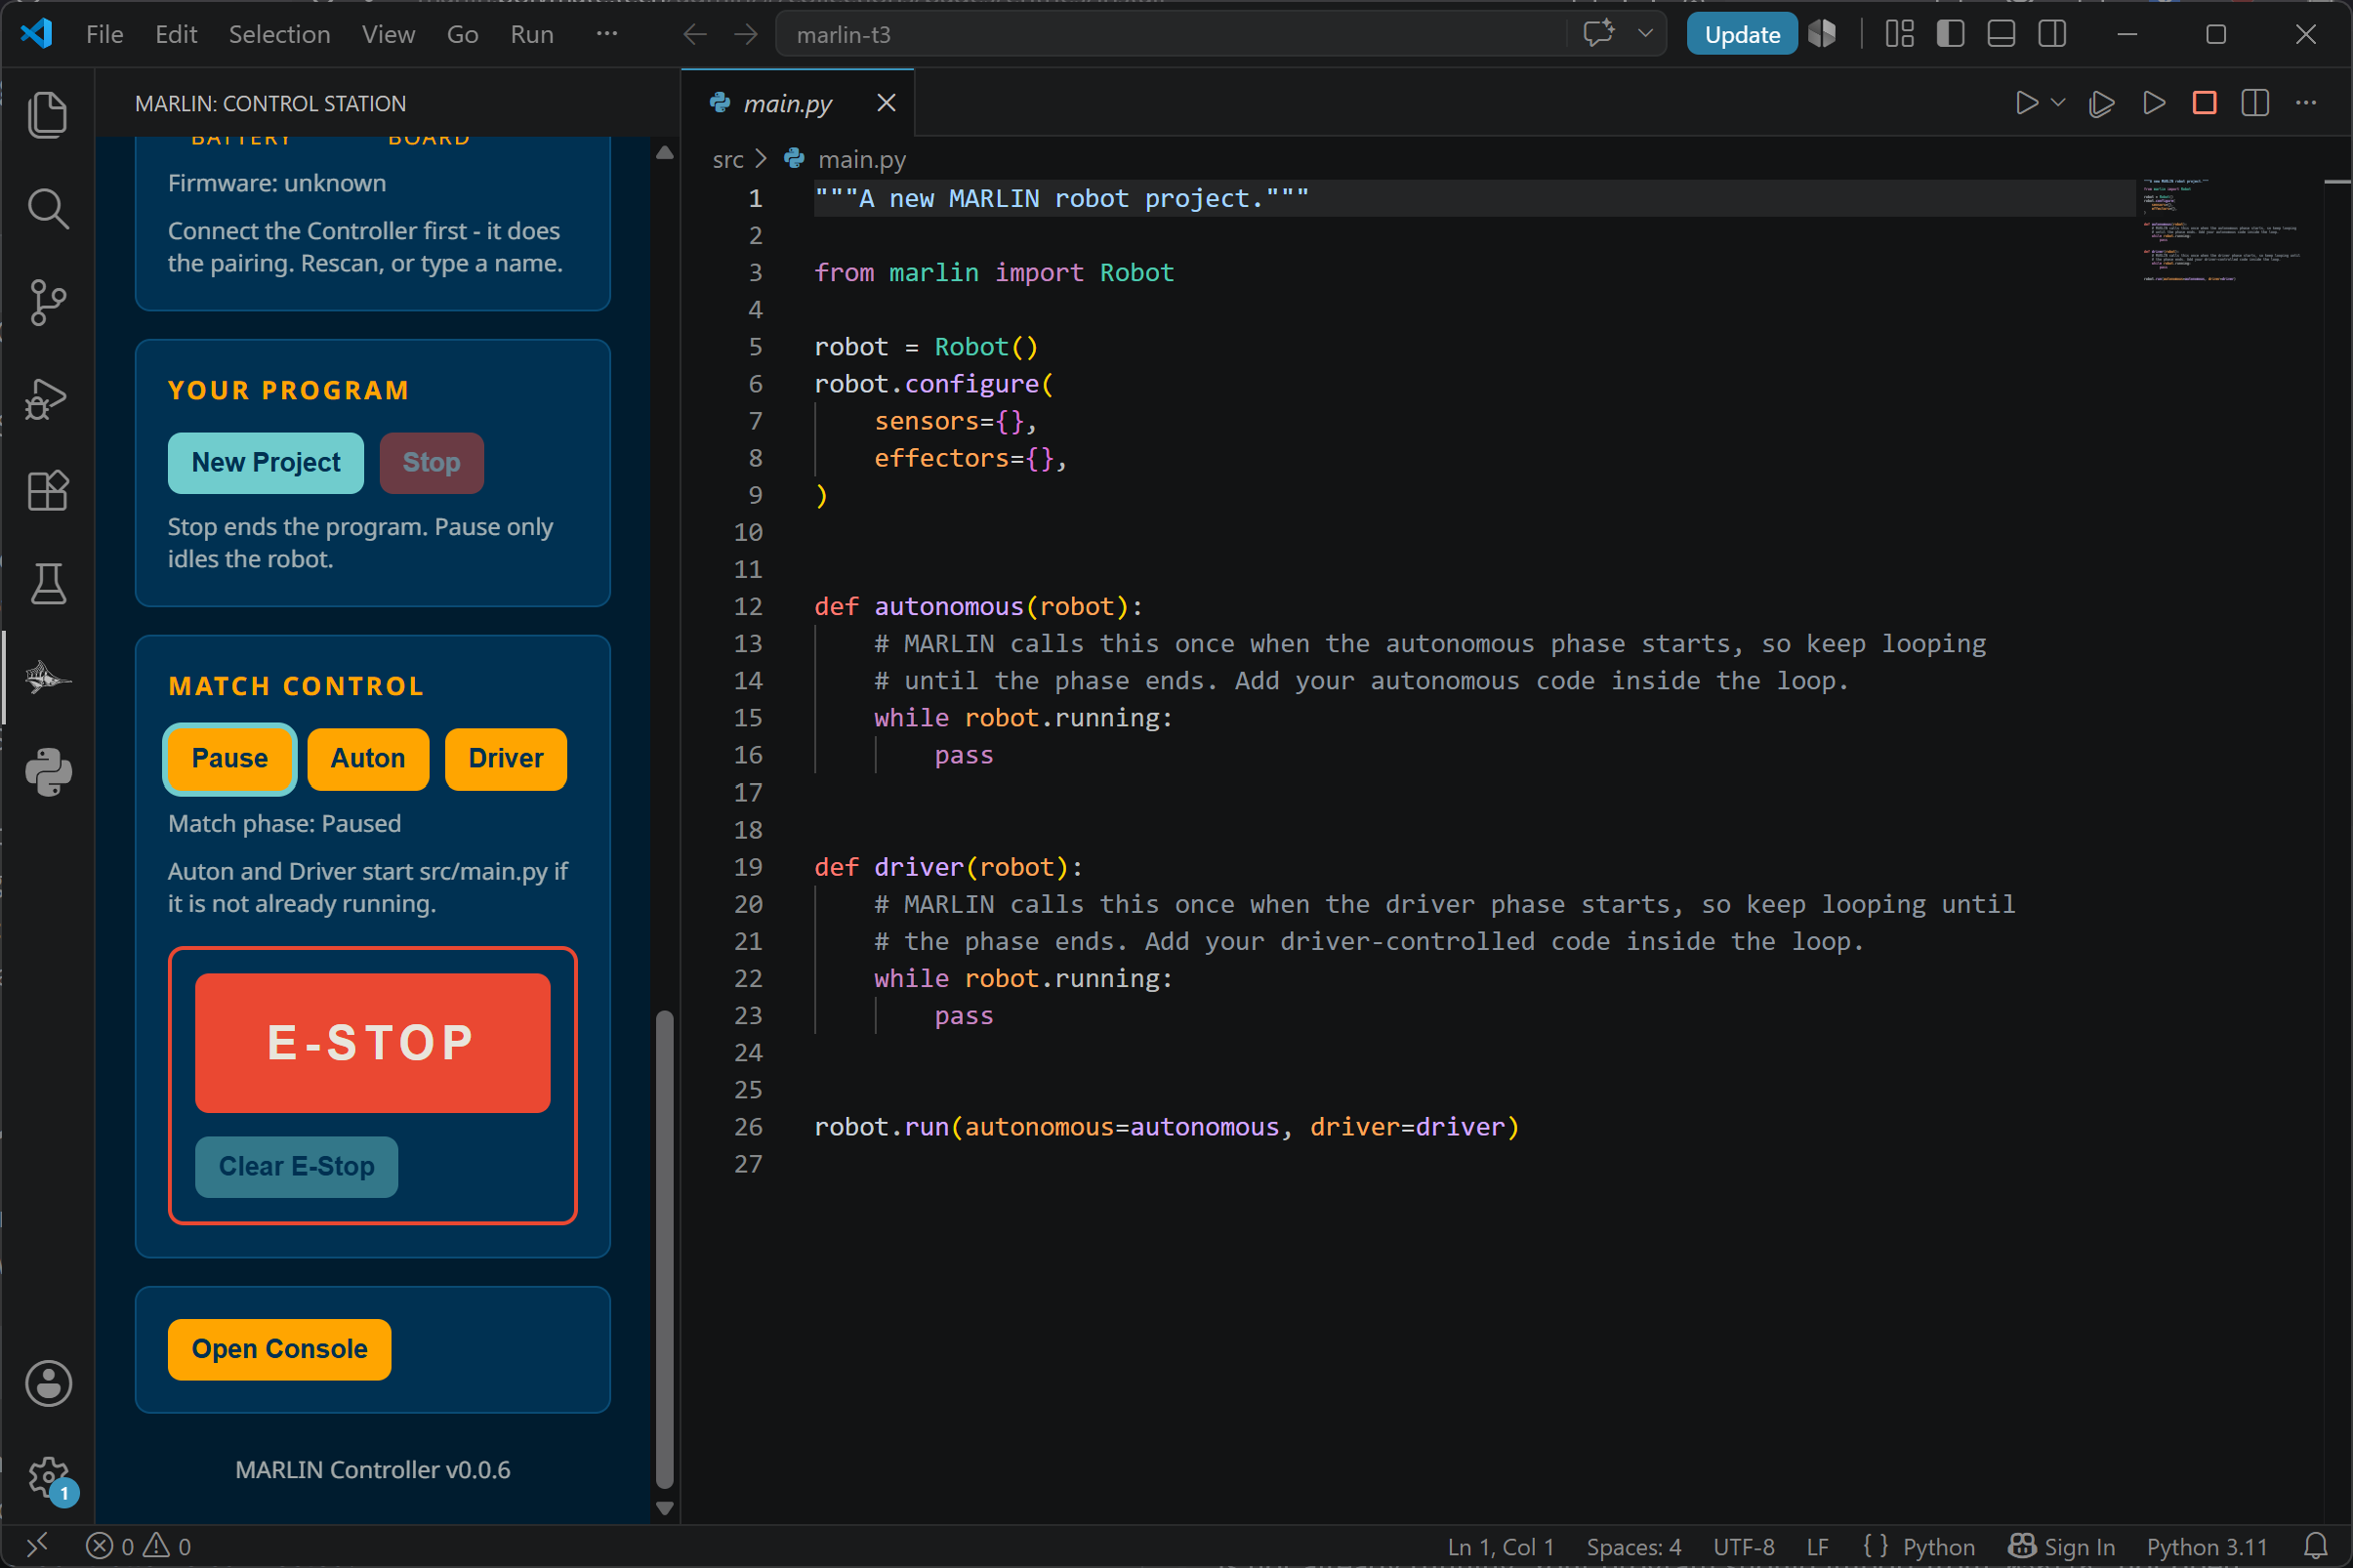
Scroll to the bottom of the control station to find Open Console. This
screenshot also shows what a freshly created project looks like: src/main.py
with empty autonomous() and driver() functions, ready for your code.
The console has a source filter (All messages, [EXT] Extension, [CON]
Controller, [FLD] Field, [OUT] Student script, [IN] Console input), a
Clear button, and an input box so you can type a value into your program's
input() call while it is running. [OUT] is your own program's output.
Read the newest message first when something goes wrong. Categories you will see include:
[EXT]extension-level problems, such as Python failing to importmarlin.[CON]Controller/serial activity, including controller button and trigger presses when connected.[FLD]pool server connection and match messages.[OUT]your running program's own output.
Note
The exact wording of individual log lines is implementation detail and can change between releases; the categories above are the stable part.
For a successful run, the console should show that the program started. For setup problems, copy the newest error message and check Troubleshooting.
Practice checklist
Before a match, confirm:
- the Controller is connected and the robot brain is paired
- the correct MARLIN project is open
- the program starts without import errors when you press Auton or Driver
- the Driver Controlled Period moves only the expected effectors
- E-Stop stops output
- Field Network settings are correct if the event pool server is being used.